

Project Admin Features#
A Project Admin is a user who has been granted administrative authority over a specific project. Project admins can view the users that belong to the project they administer, oversee its compute sessions and model deployments, and manage its storage folders — all without needing system-wide superadmin privileges.
The Project Admin features described in this chapter are supported from Backend.AI WebUI 26.4.0 and later.
Identifying Project Admin Projects#
When you open the project dropdown in the header, projects in which you have the project-admin role are marked with a shield-shaped badge next to the project name. Hovering the badge displays a Project Admin tooltip, confirming that selecting this project will reveal the project-admin sidebar entries described below.
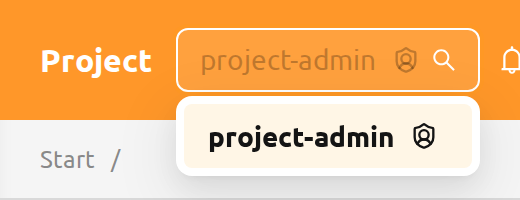
Switching to a different project from the header's project selector re-evaluates the user's role: the same user may act as a project admin in one project and as a regular user in another within the same login session. To learn how project-admin roles are granted and revoked, see Grant Project Admin Authority in the RBAC Management chapter.
The Project Admin Sidebar#
When you select a project in which you are a project admin, the sidebar's Administration section displays four entries dedicated to managing that project:
- Users — the members of the current project
- Data — the storage folders owned by the current project
- Sessions — the compute sessions owned by users in the current project
- Deployments — the model deployments owned by the current project
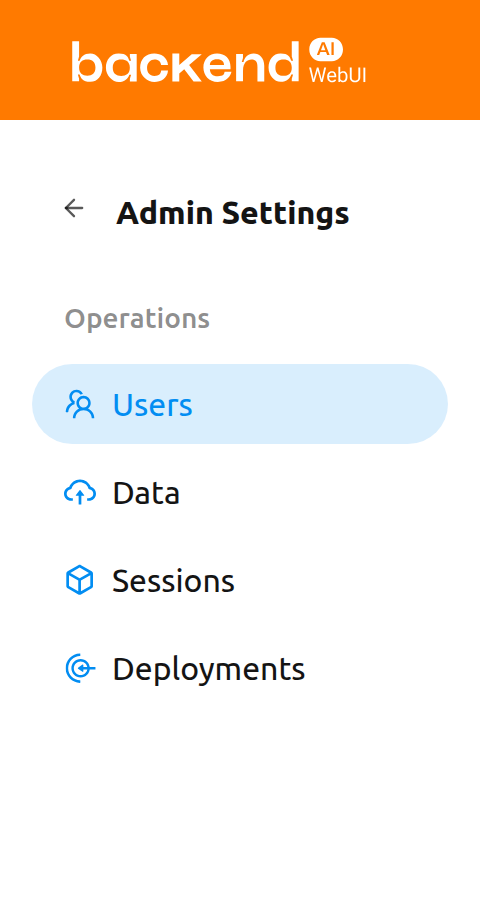
Each of the four pages renders an info banner at the top reminding you that the contents are scoped to the currently selected project.

Users#
The Users page lists every user who belongs to the currently selected project. Use this page to review project membership at a glance — for example, to confirm who has access to the project's resources or to identify inactive accounts.
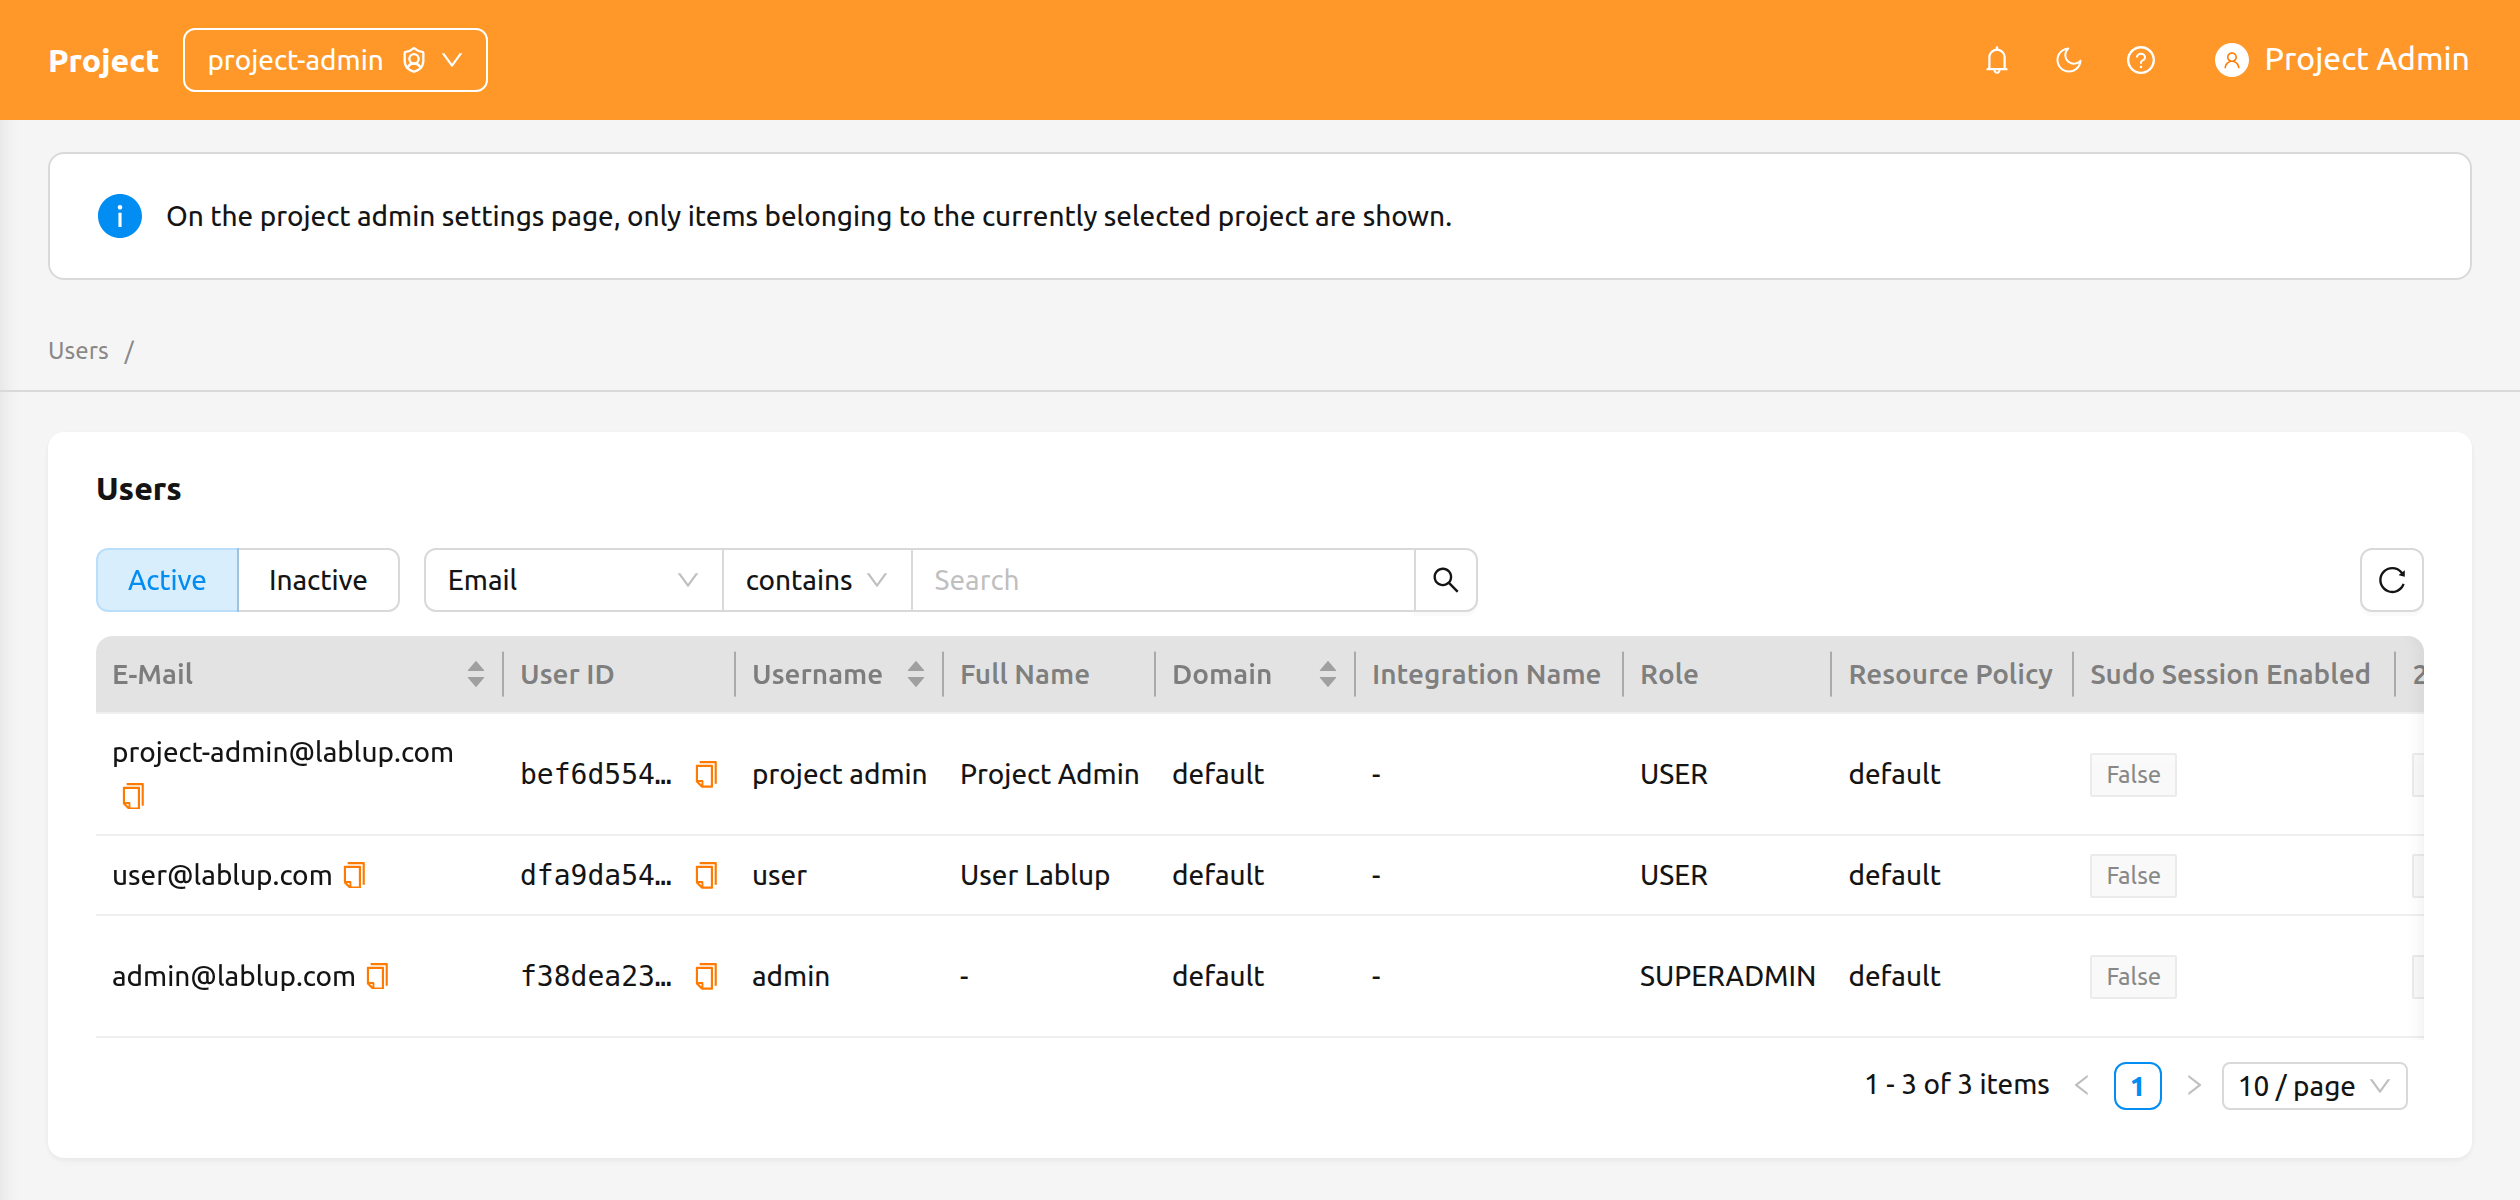
The page provides the following controls:
- Active / Inactive segmented control: Toggle between active and inactive users. Active is selected by default.
- Property filter: Filter the list by E-Mail, ID, Username, Role, or Created At.
The Users page is read-only for project admins. There are no create, edit, or deactivate actions on this page — those operations are reserved for superadmins on the system-wide Users page in the Admin Features chapter.
Sessions#
The Sessions page lists the compute sessions owned by users in the currently selected project. Use this page to monitor active workloads, identify long-running sessions, or terminate sessions that are no longer needed.
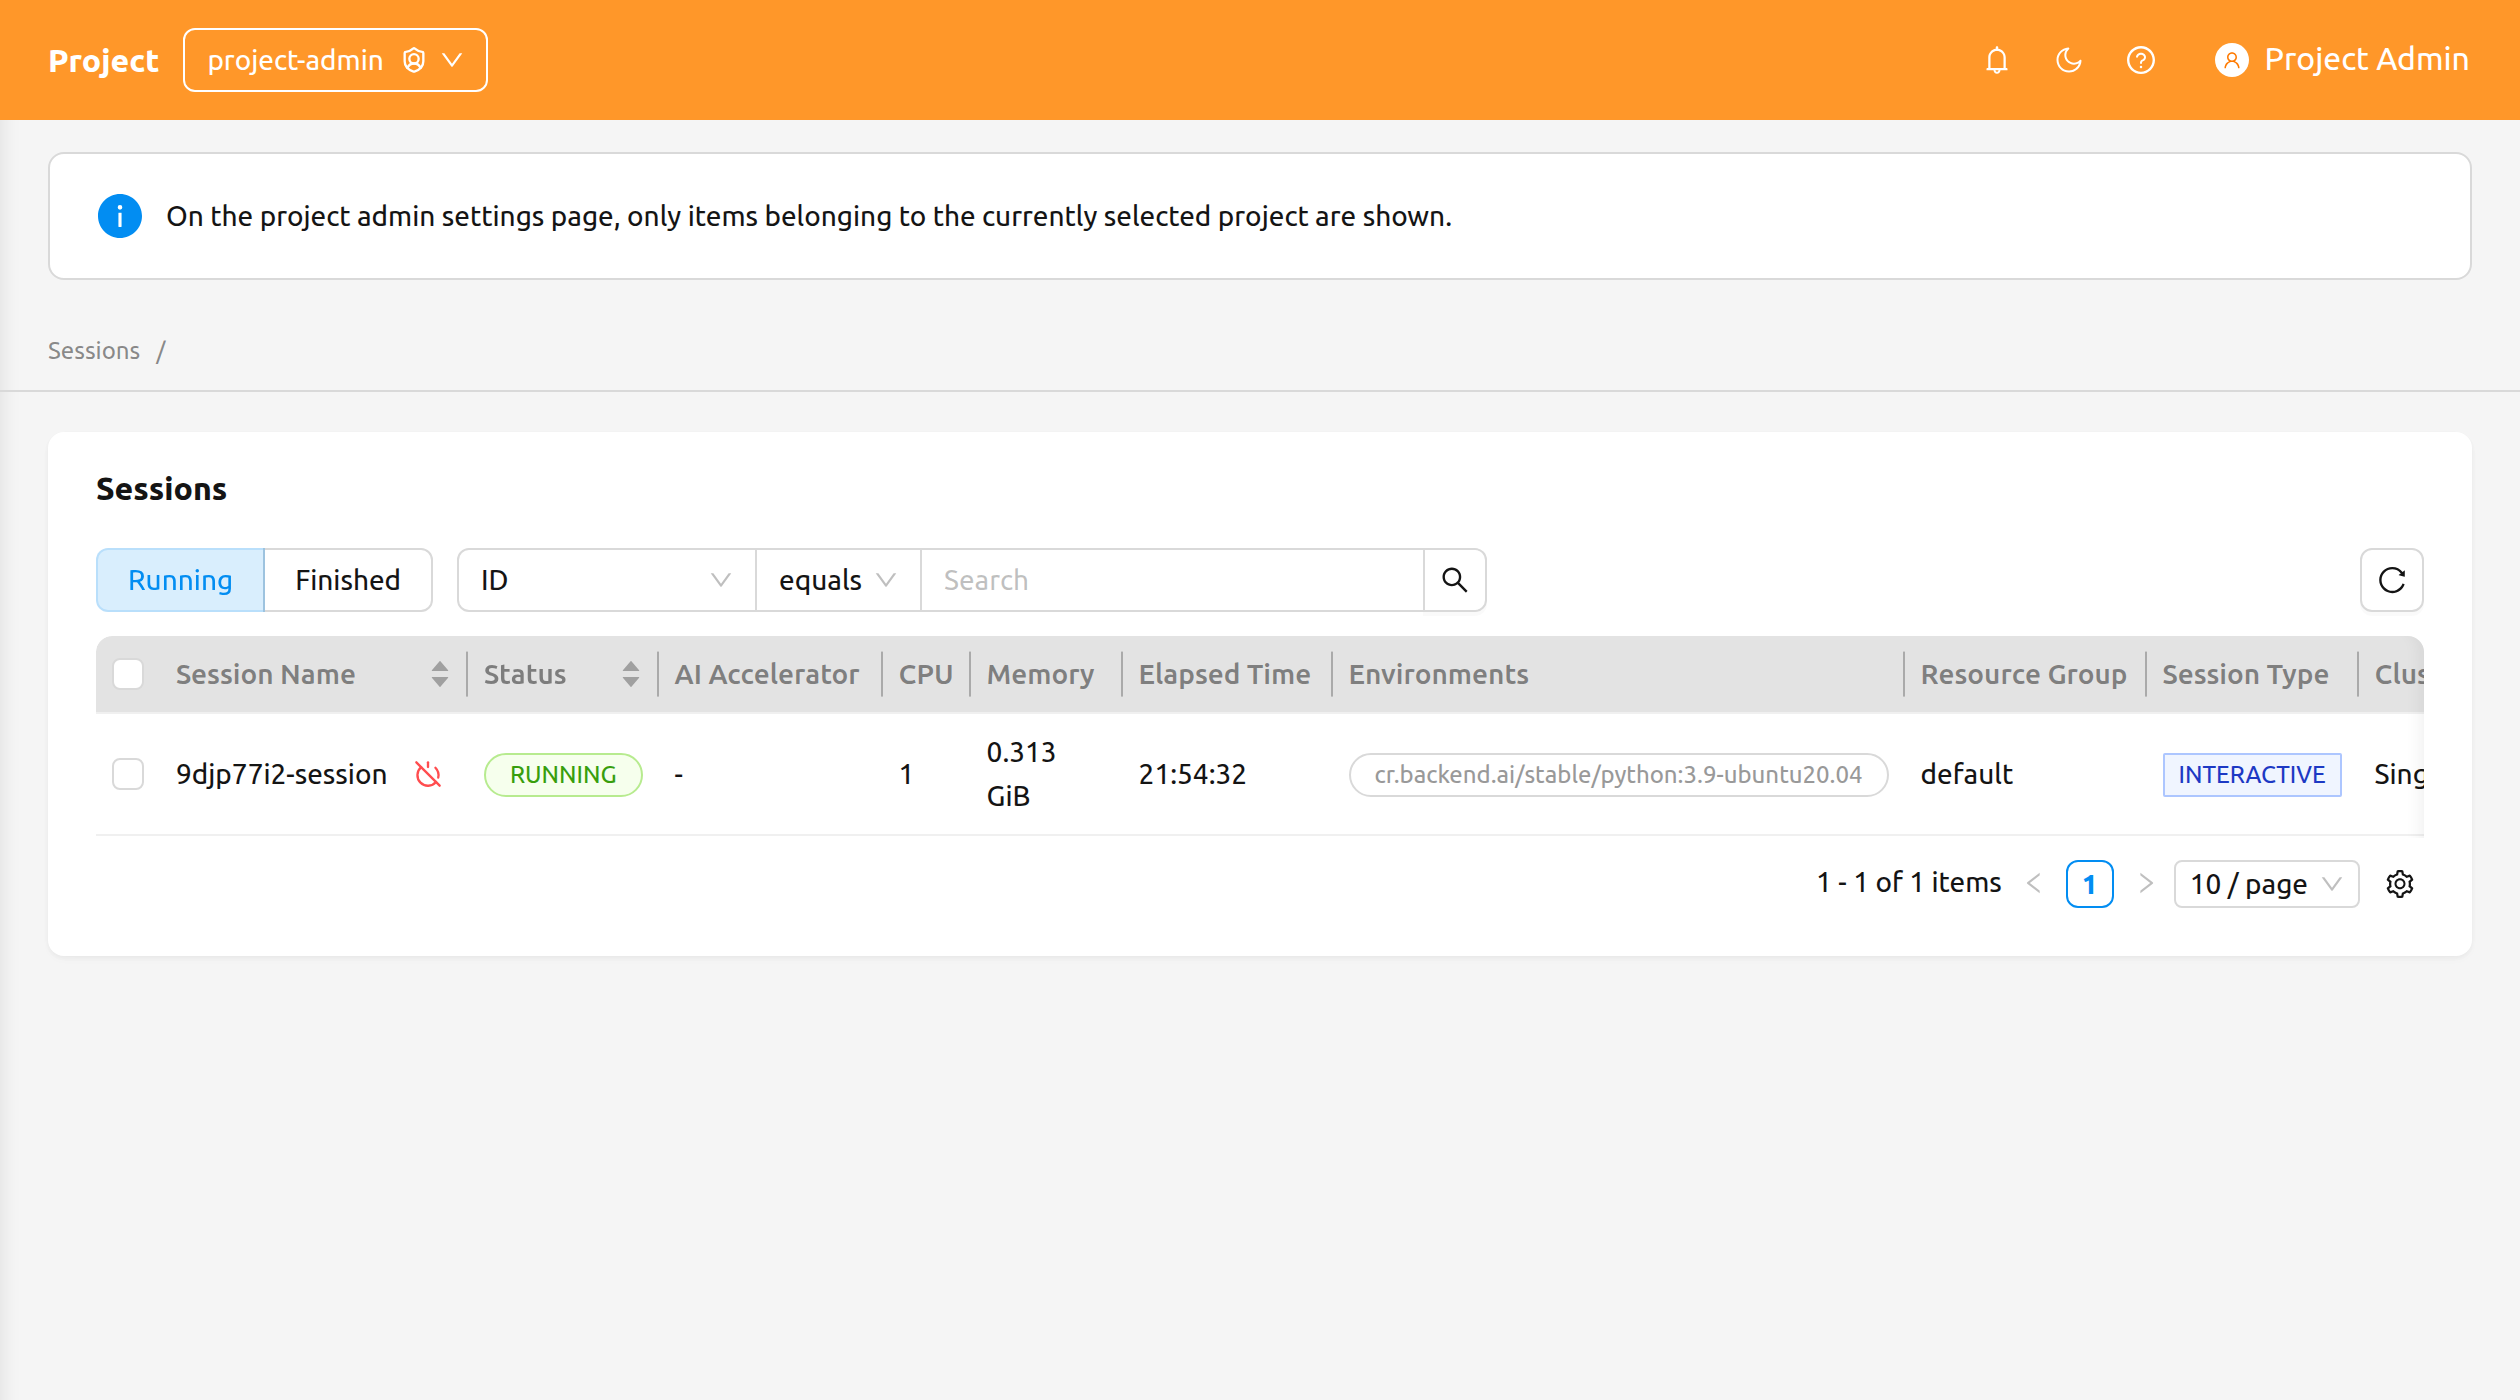
The page provides the following controls:
- Running / Finished segmented control: Toggle between currently running sessions and sessions that have already finished.
- Property filter and sorting: Filter the list by ID, Session Name, or Owner UUID. Click a sortable column header to sort the table.
Terminate Sessions#
To terminate one or more sessions:
- Select the sessions you want to terminate using the checkboxes in the leftmost column. To terminate a single session, you can use the row's terminate action instead.
- Click the power-off icon in the table header to open the confirmation modal.
- Review the list of targeted sessions in the modal and click OK to confirm.
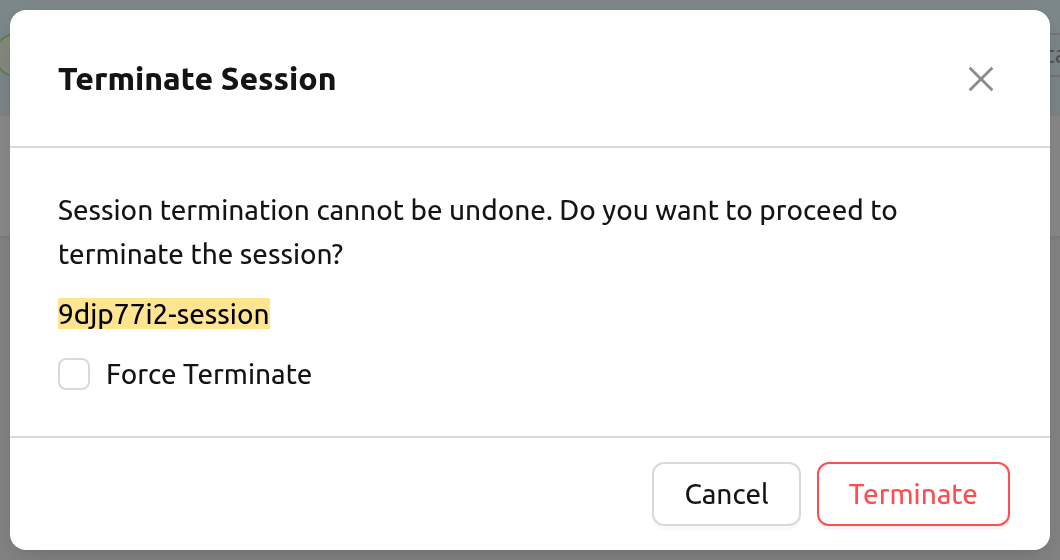
Clicking a session name on the project-admin Sessions page does not currently open a session detail drawer. For background on compute sessions and their detail view, see the Session Page chapter.
Deployments#
The Deployments page lists the model deployments owned by the currently selected project. Use this page to oversee inference endpoints, edit deployment settings, or remove deployments that are no longer in use.
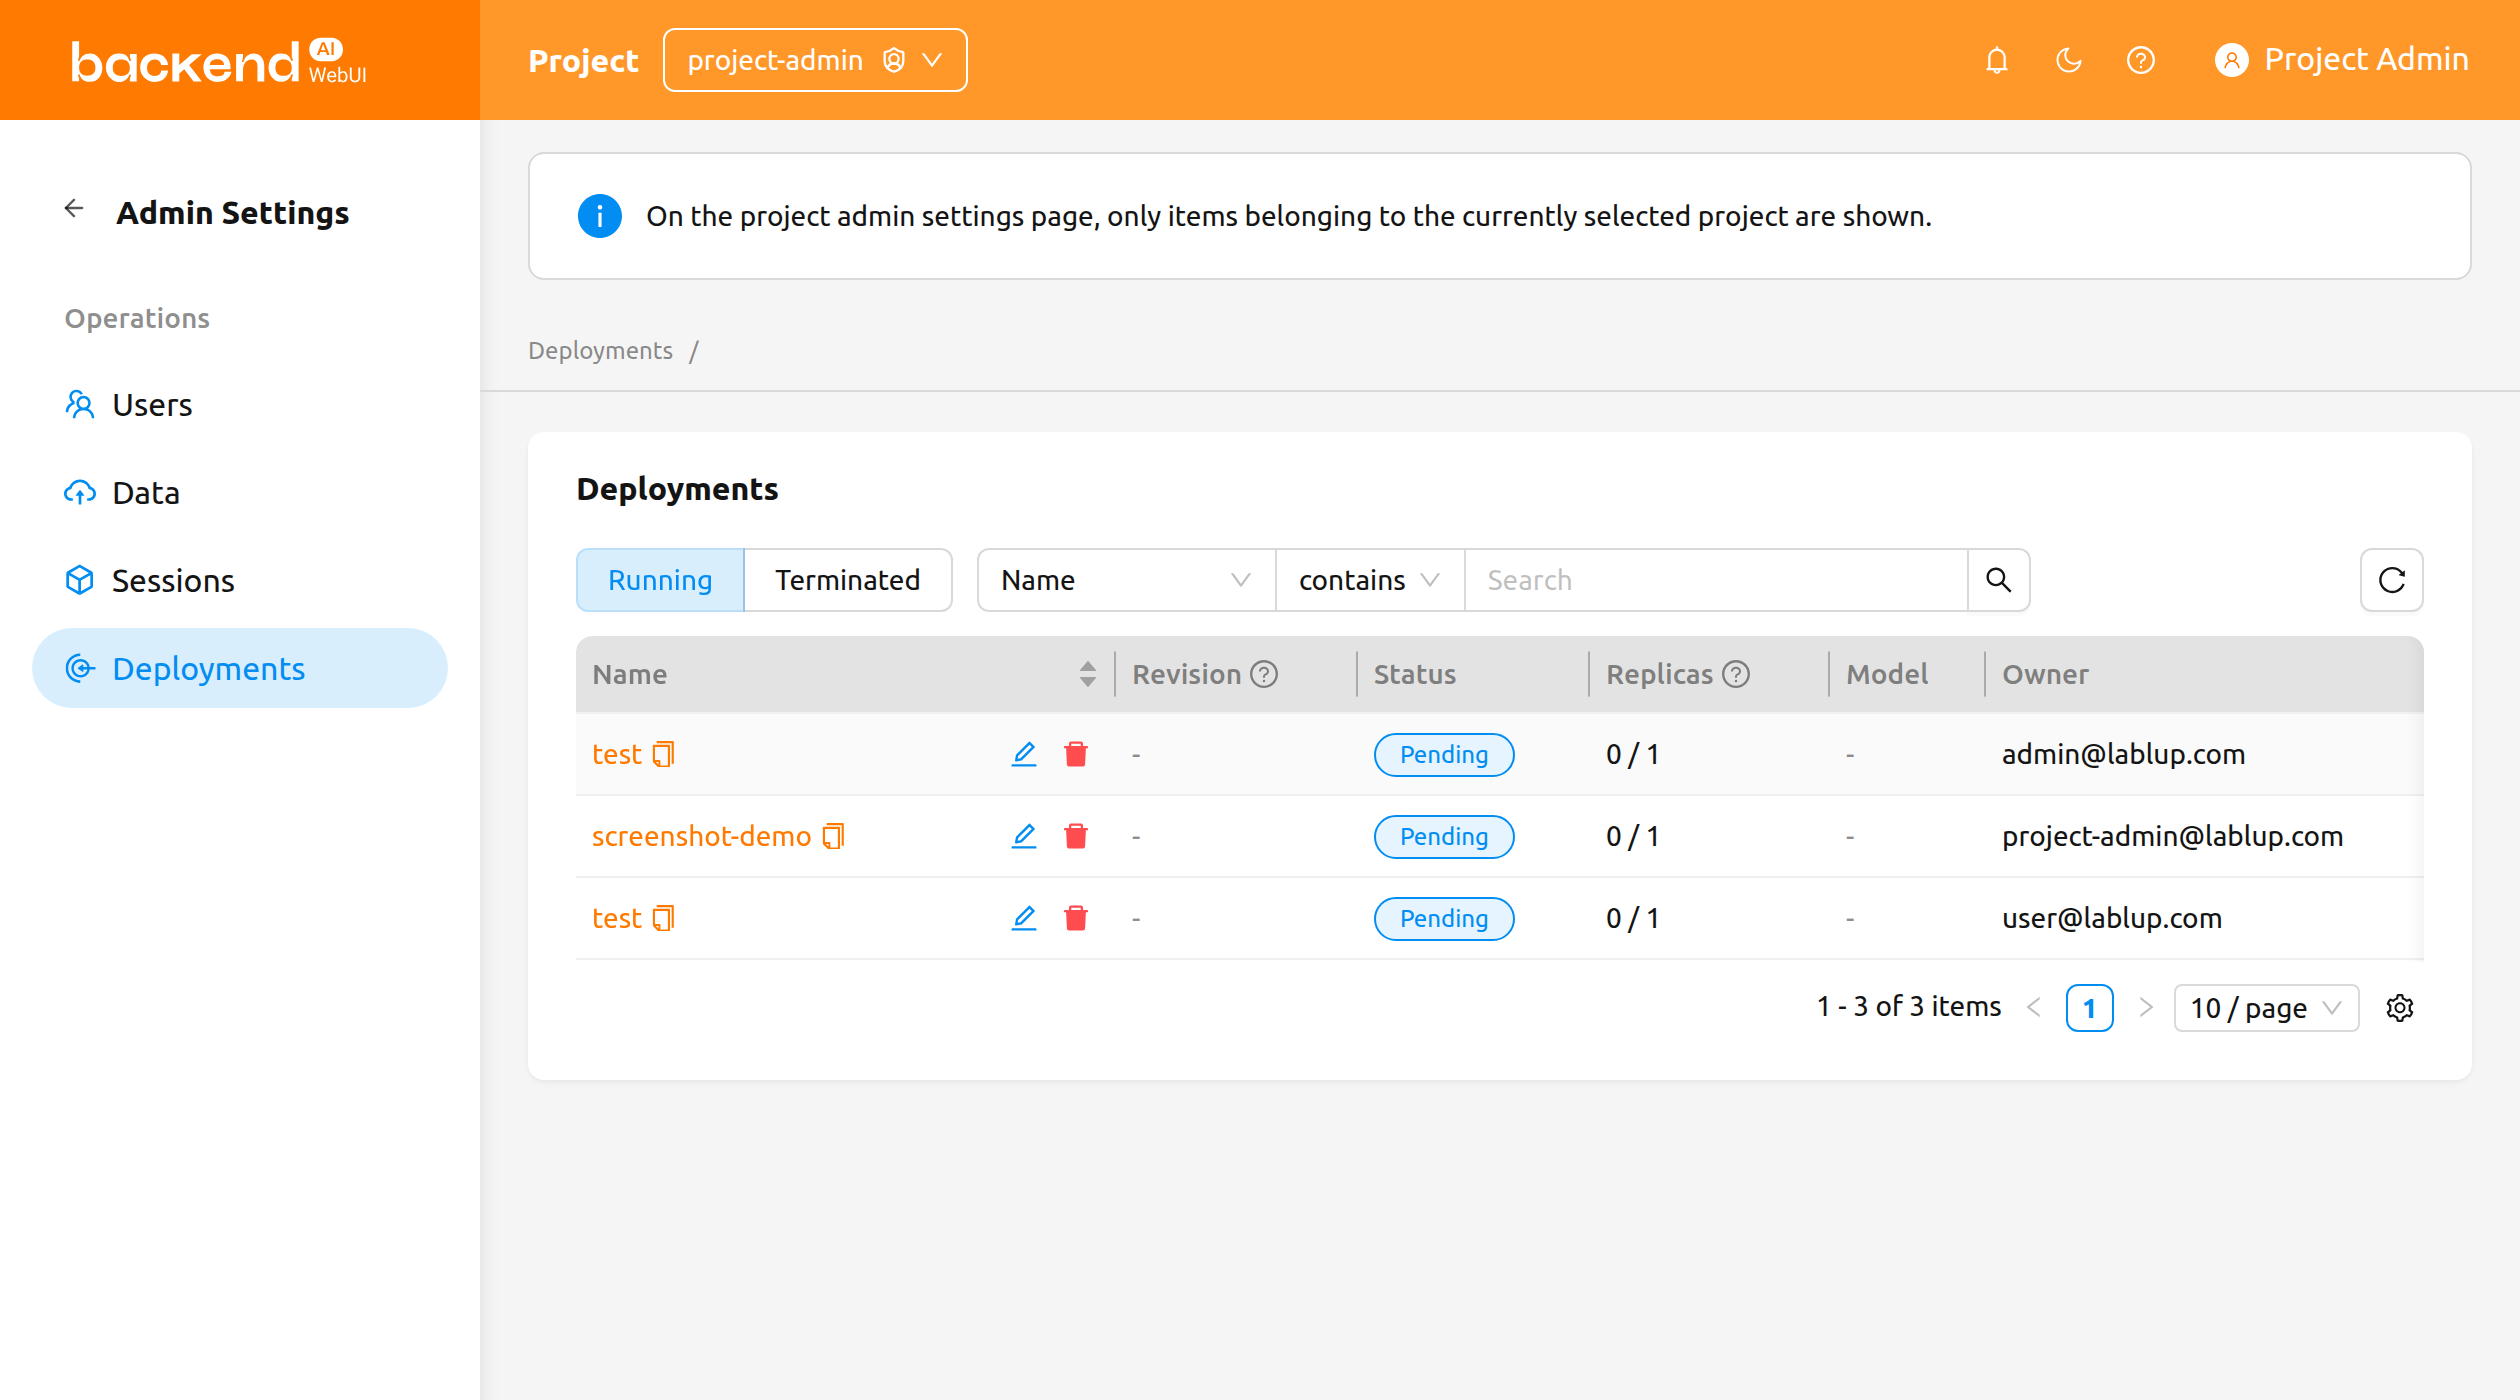
The page provides the following controls:
- Running / Terminated segmented control: Toggle between currently running deployments and deployments that have been terminated.
- Property filter: Filter the list by Name, Tags, Endpoint URL, or Open to Public.
The table displays the deployment's Name, Revision, Status, Replicas, Model, Created At, and Owner columns, along with the deployment's domain, project, and resource group when relevant.
Deployment Actions#
The following actions are available on each deployment row:
- Click the deployment name to navigate to the deployment detail page within the project-admin scope.
- Click the pencil icon to edit the deployment's configuration in the settings modal.
- Click the trash icon to delete the deployment after confirmation.
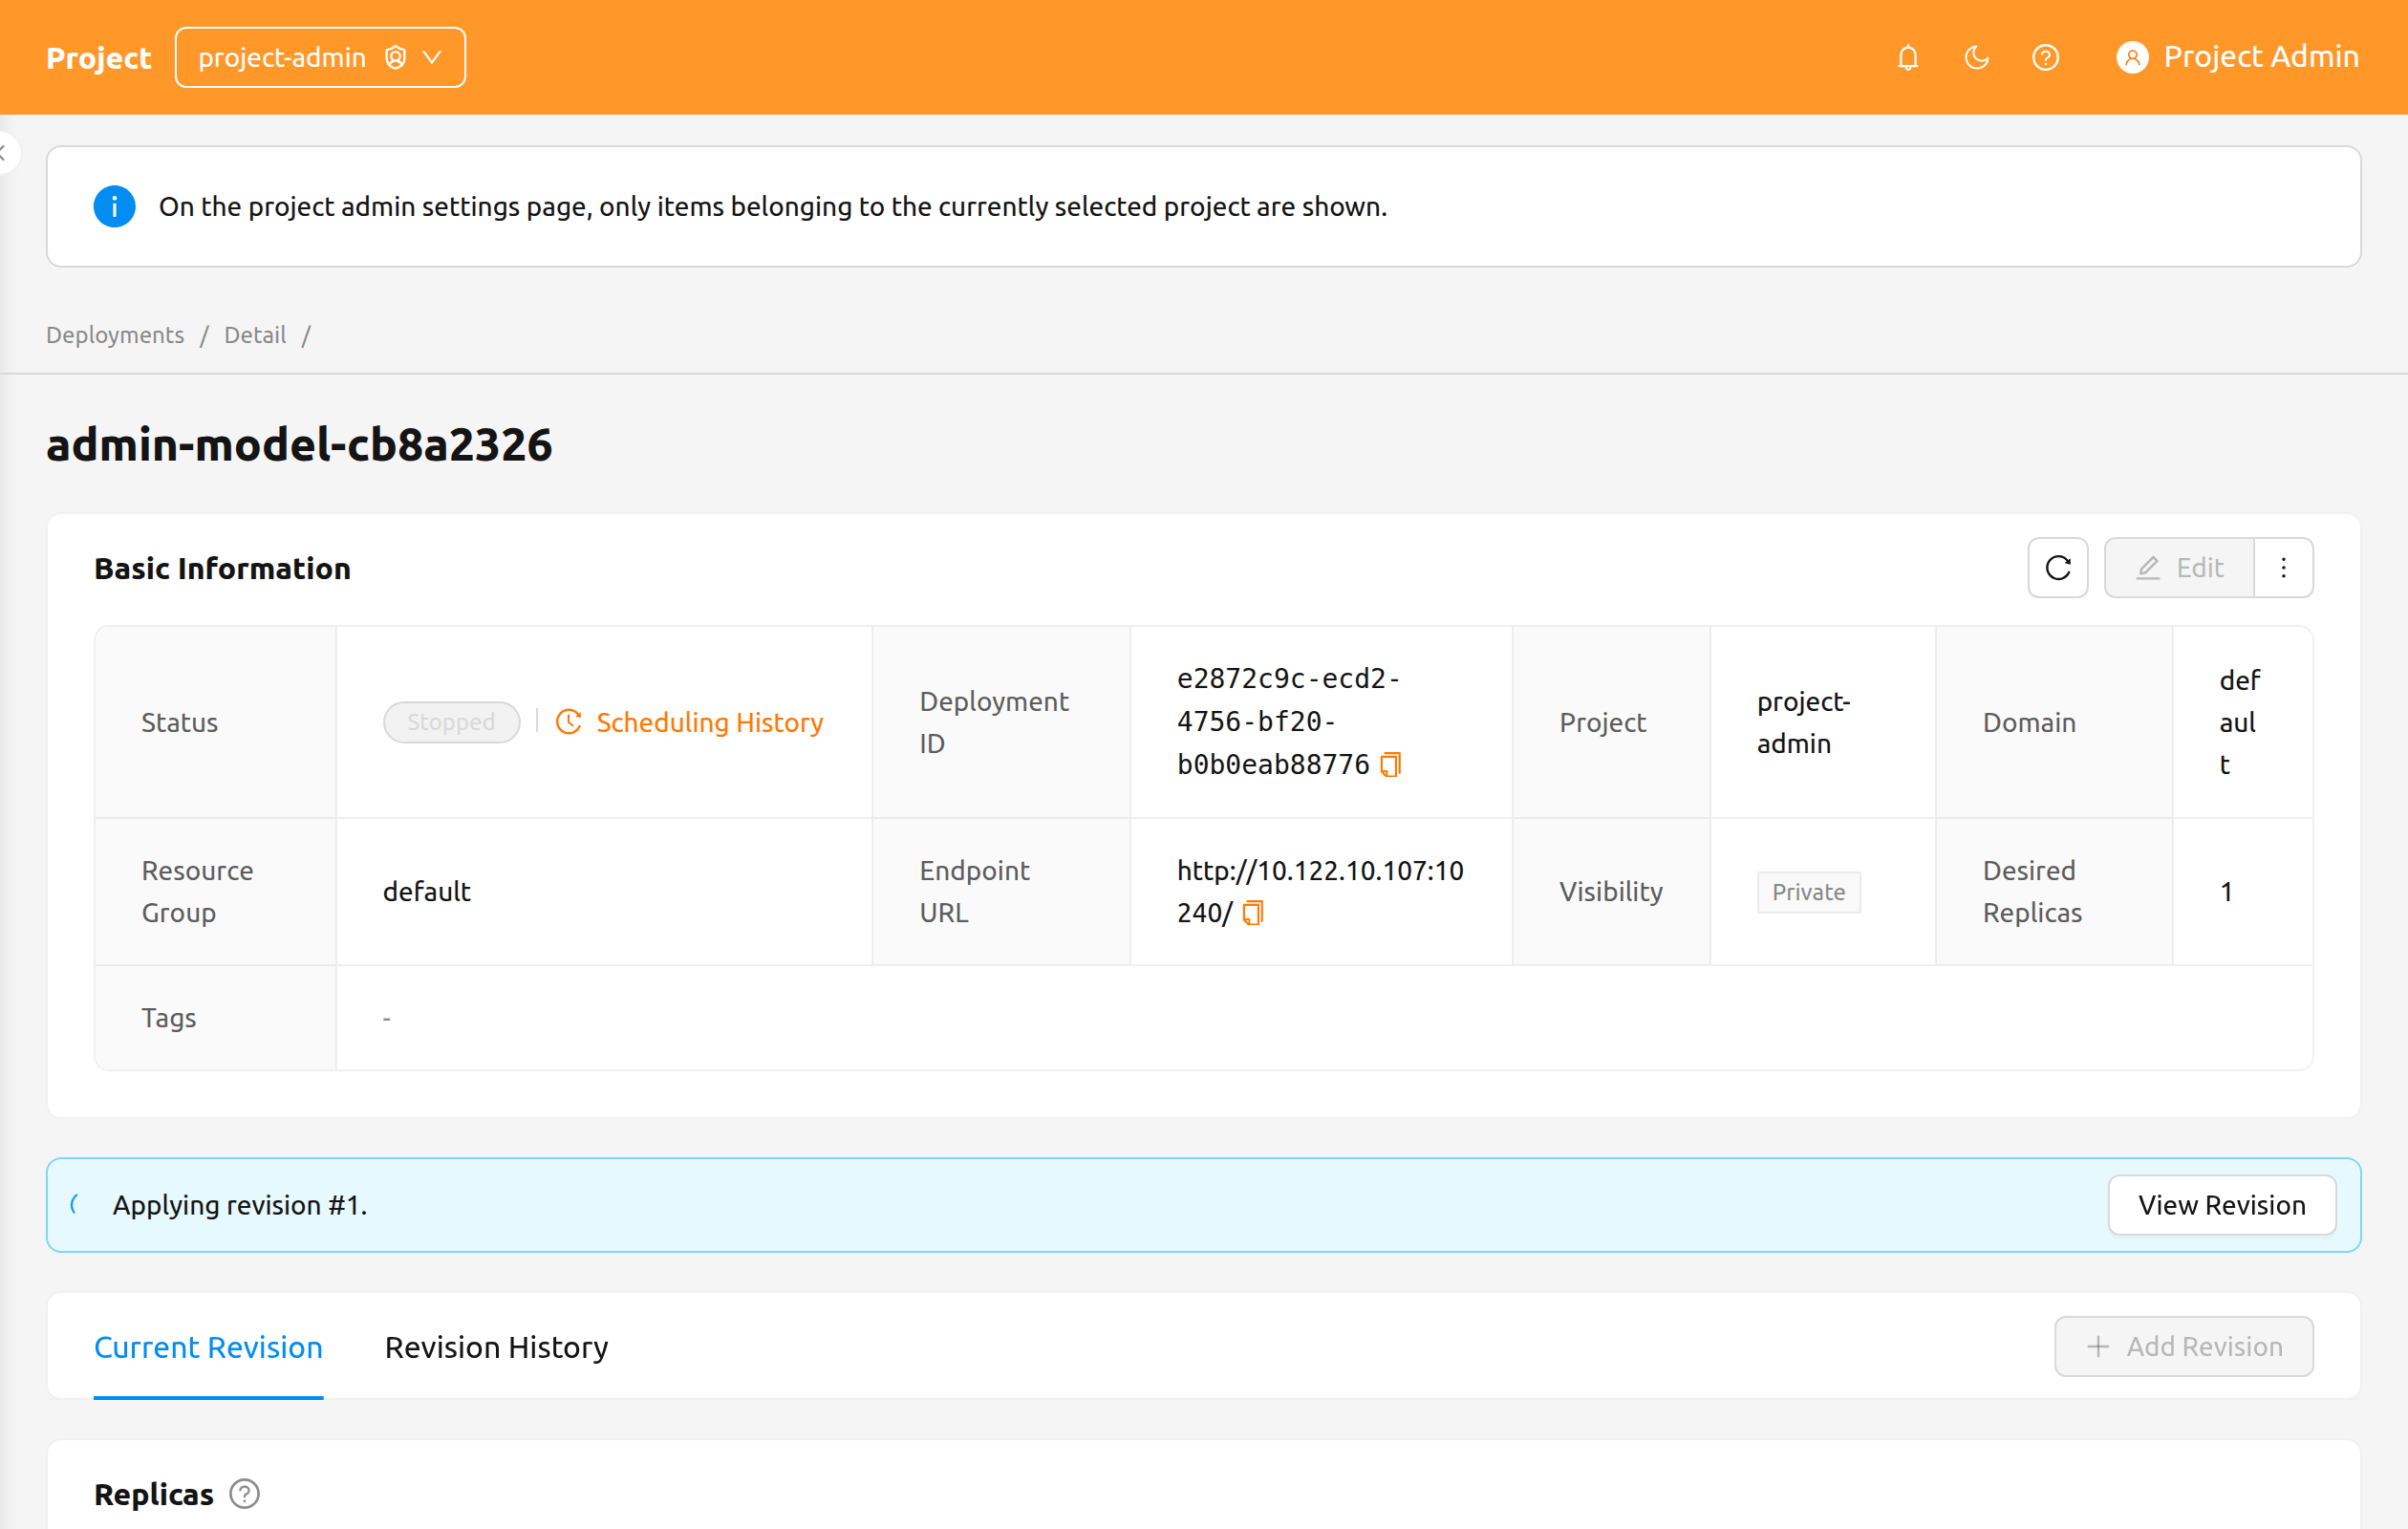
For details about deployment revisions, replicas, and traffic routing, see the Deployments chapter.
Data#
The Data page lists the storage folders (vfolders) owned by the currently selected project. Use this page to create project-shared folders, restore folders that were accidentally deleted, or purge folders that no longer need to be retained.
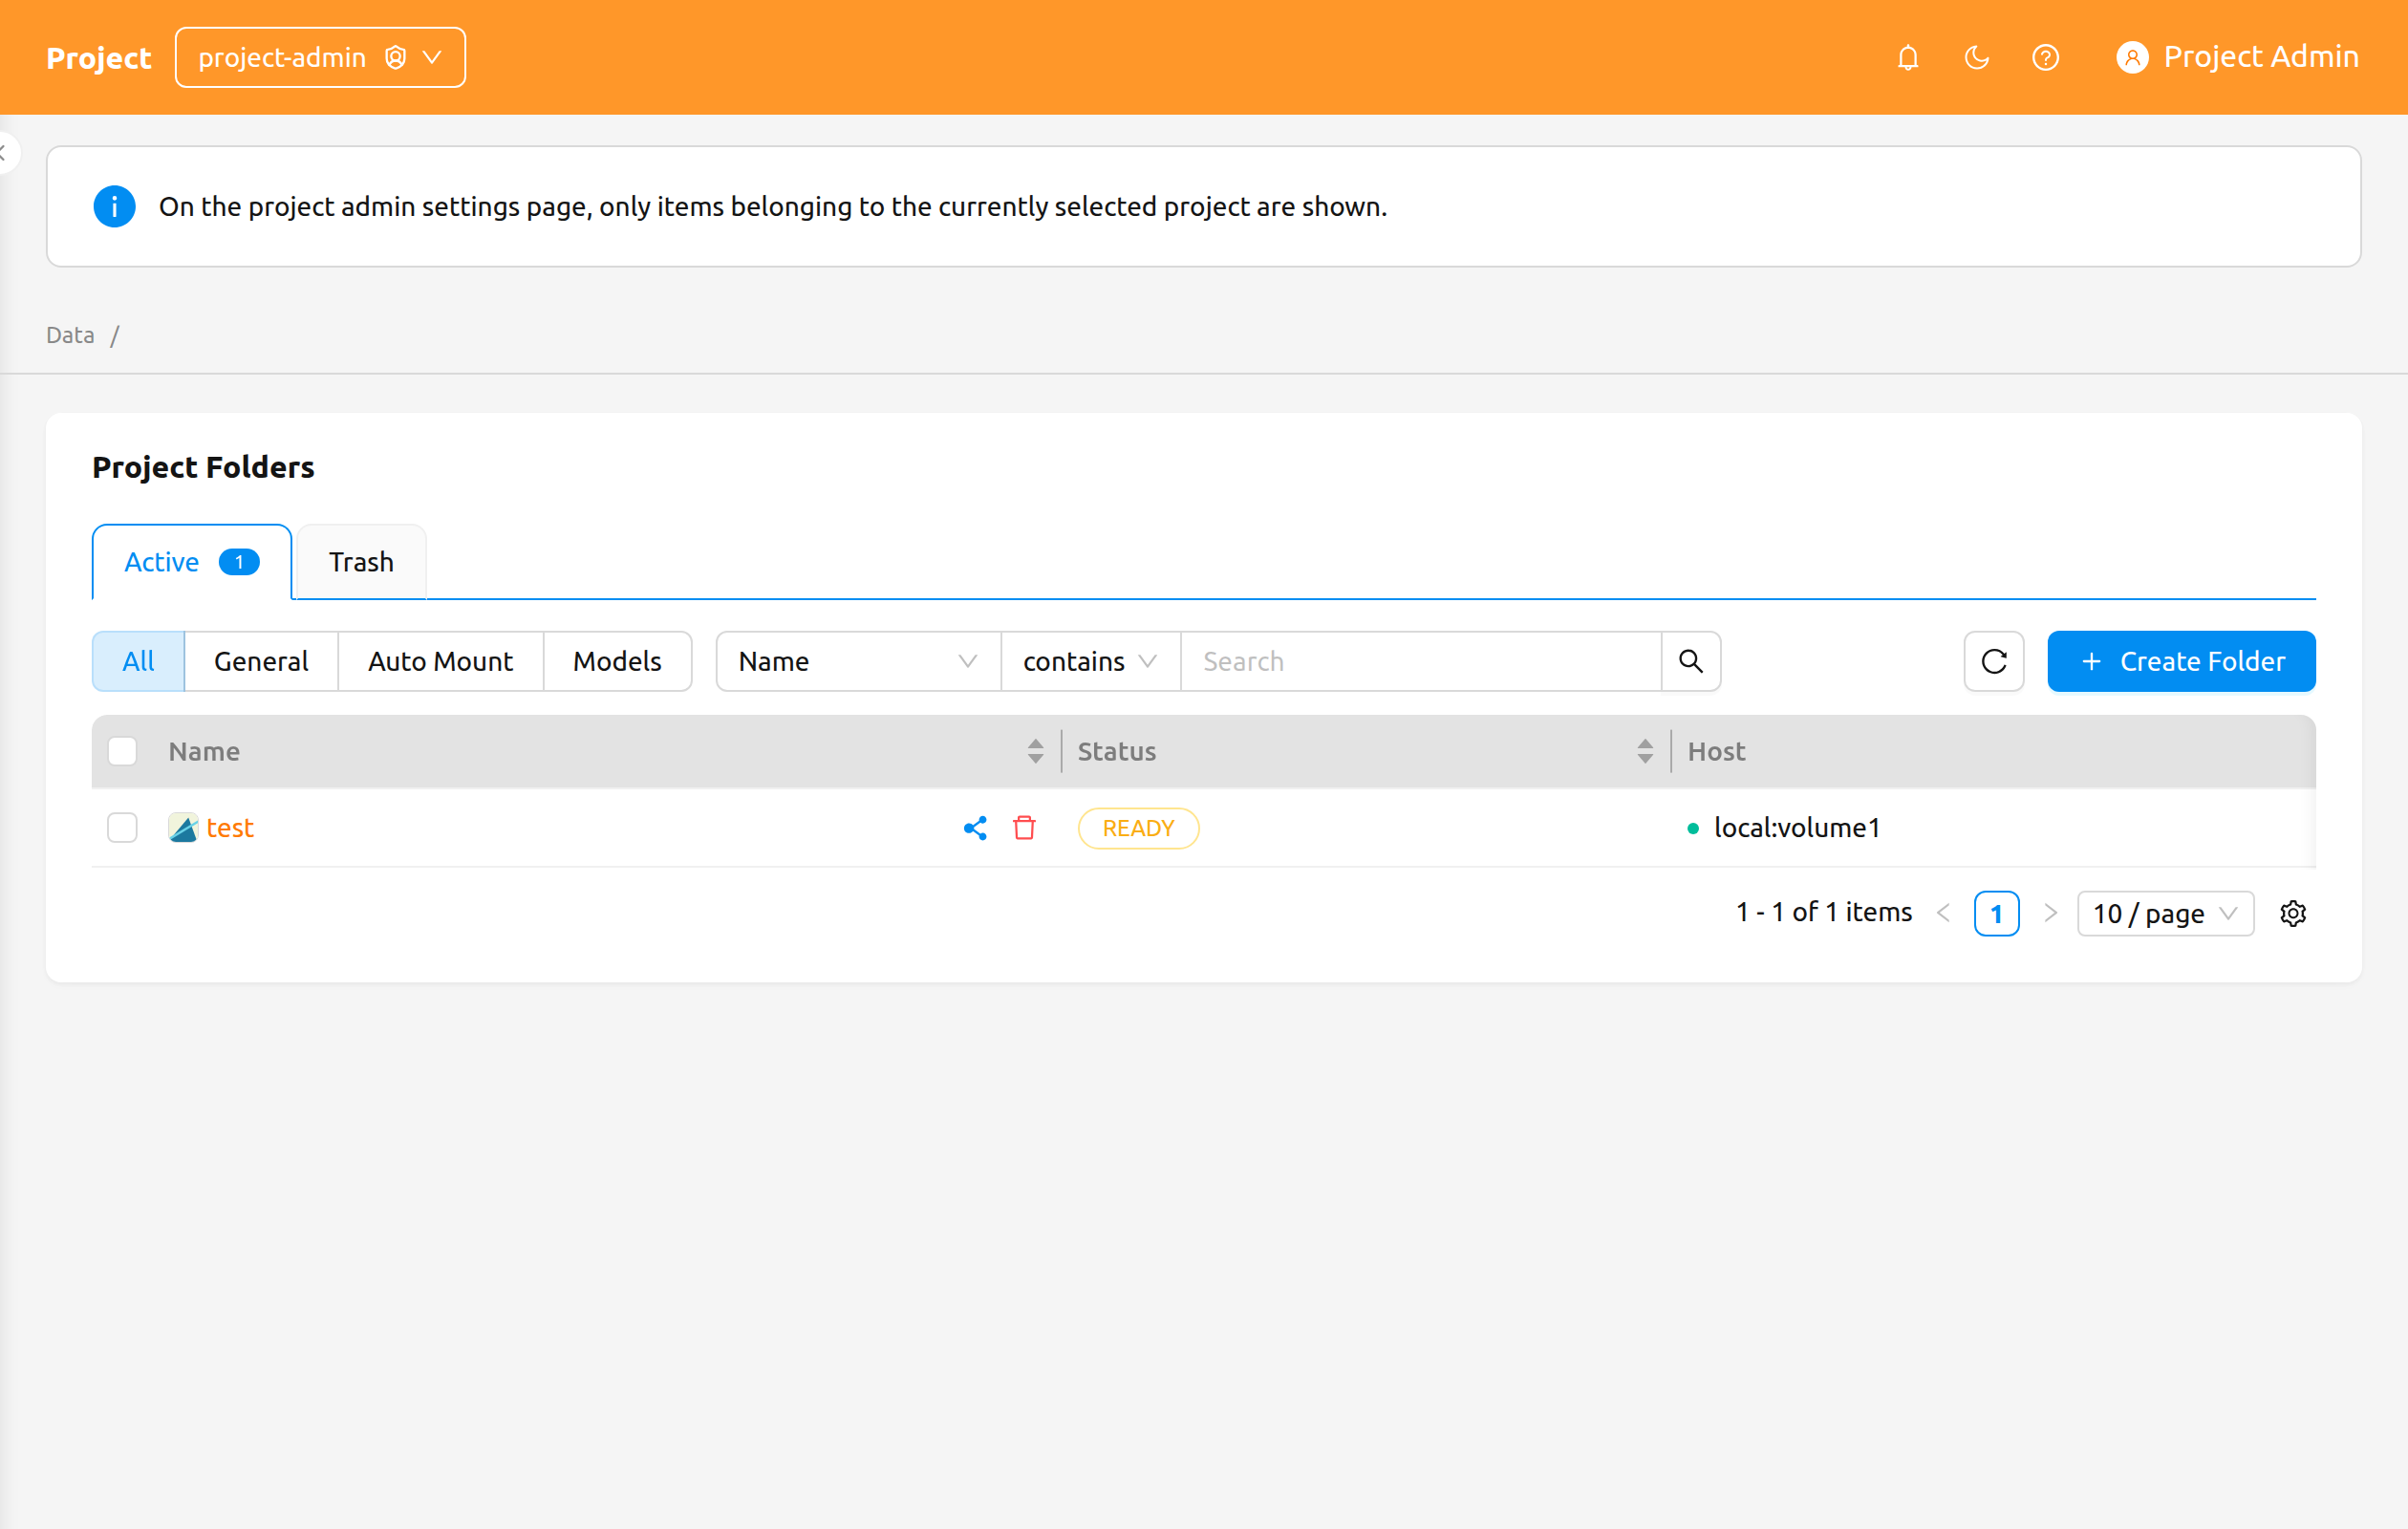
The page provides the following controls:
- Active / Deleted tabs: Switch between currently active folders and folders that have been soft-deleted.
- Mode pill: Filter by folder usage mode — All, General, Data, Auto Mount, or Model.
- Property filter: Filter the list using the standard storage-folder property filter.
Create a Folder#
To create a new folder from this page:
- Click the Create Folder button at the top right of the page.
- Fill in the folder details in the creation modal.
- Click OK to create the folder.
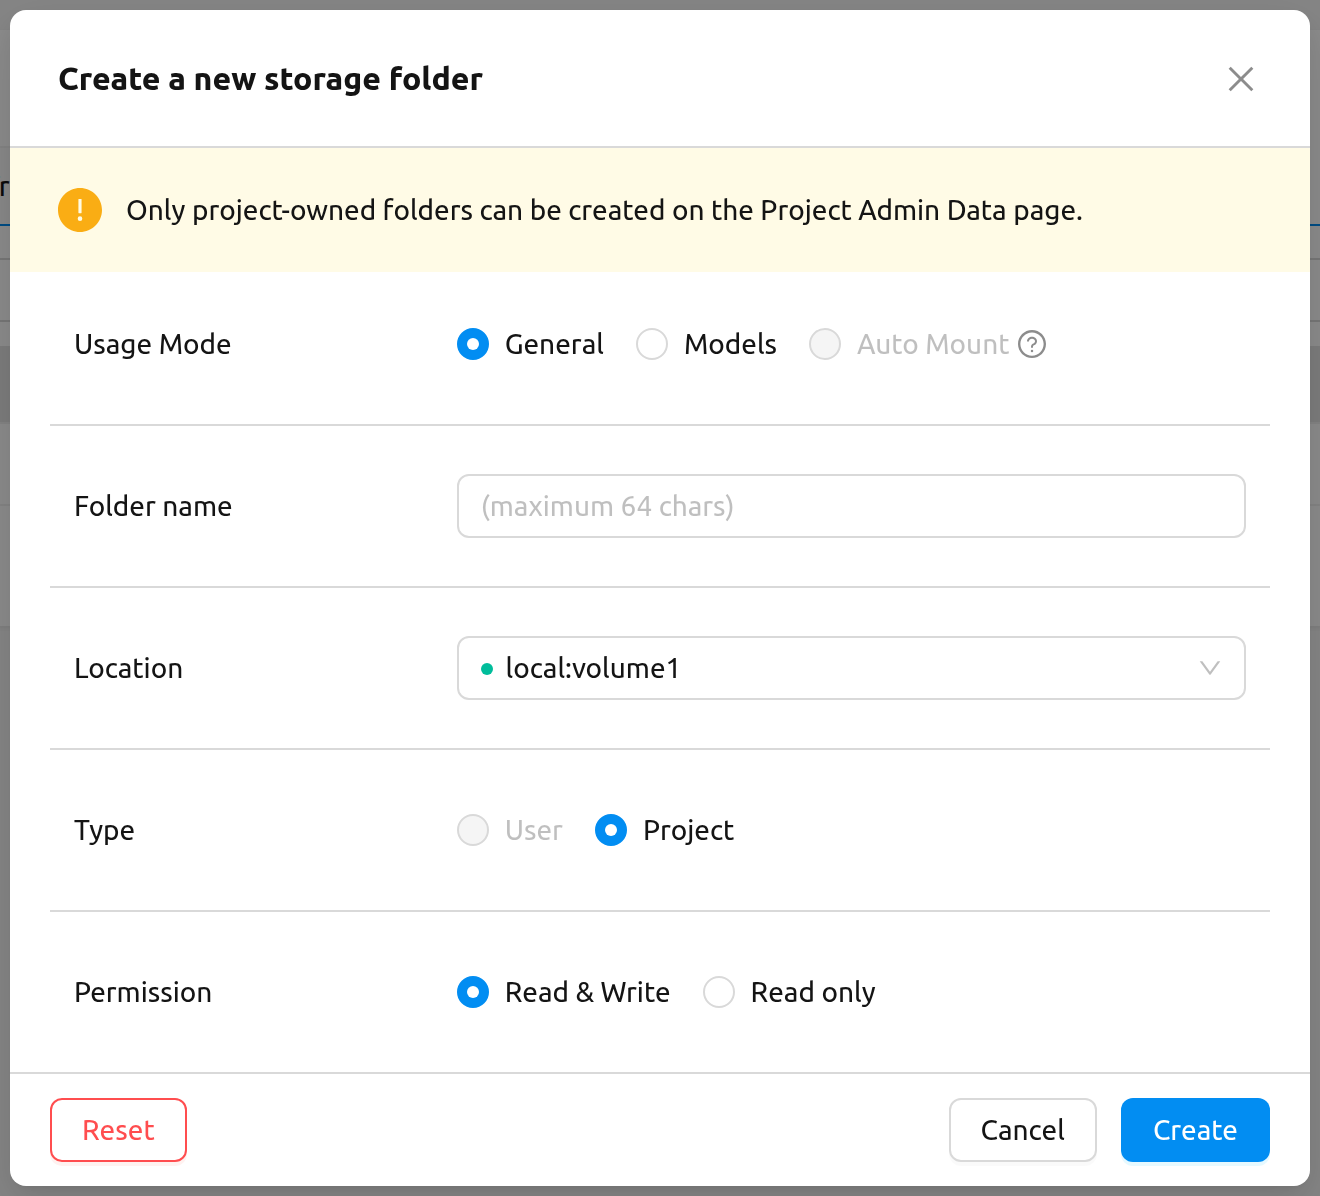
Only project-owned folders can be created from the Project Admin Data page. The creation modal displays the following message to make this explicit:
Only project-owned folders can be created on the Project Admin Data page.
For details about folder usage modes, permissions, and quota, see the Vfolder chapter.
Restore or Permanently Delete a Folder#
Switch to the Deleted tab to see folders that have been soft-deleted. Two actions are available on each row:
- Restore: Move the folder back to the Active tab.
- Delete forever: Permanently purge the folder. This action is irreversible and requires you to type the folder's name to confirm.
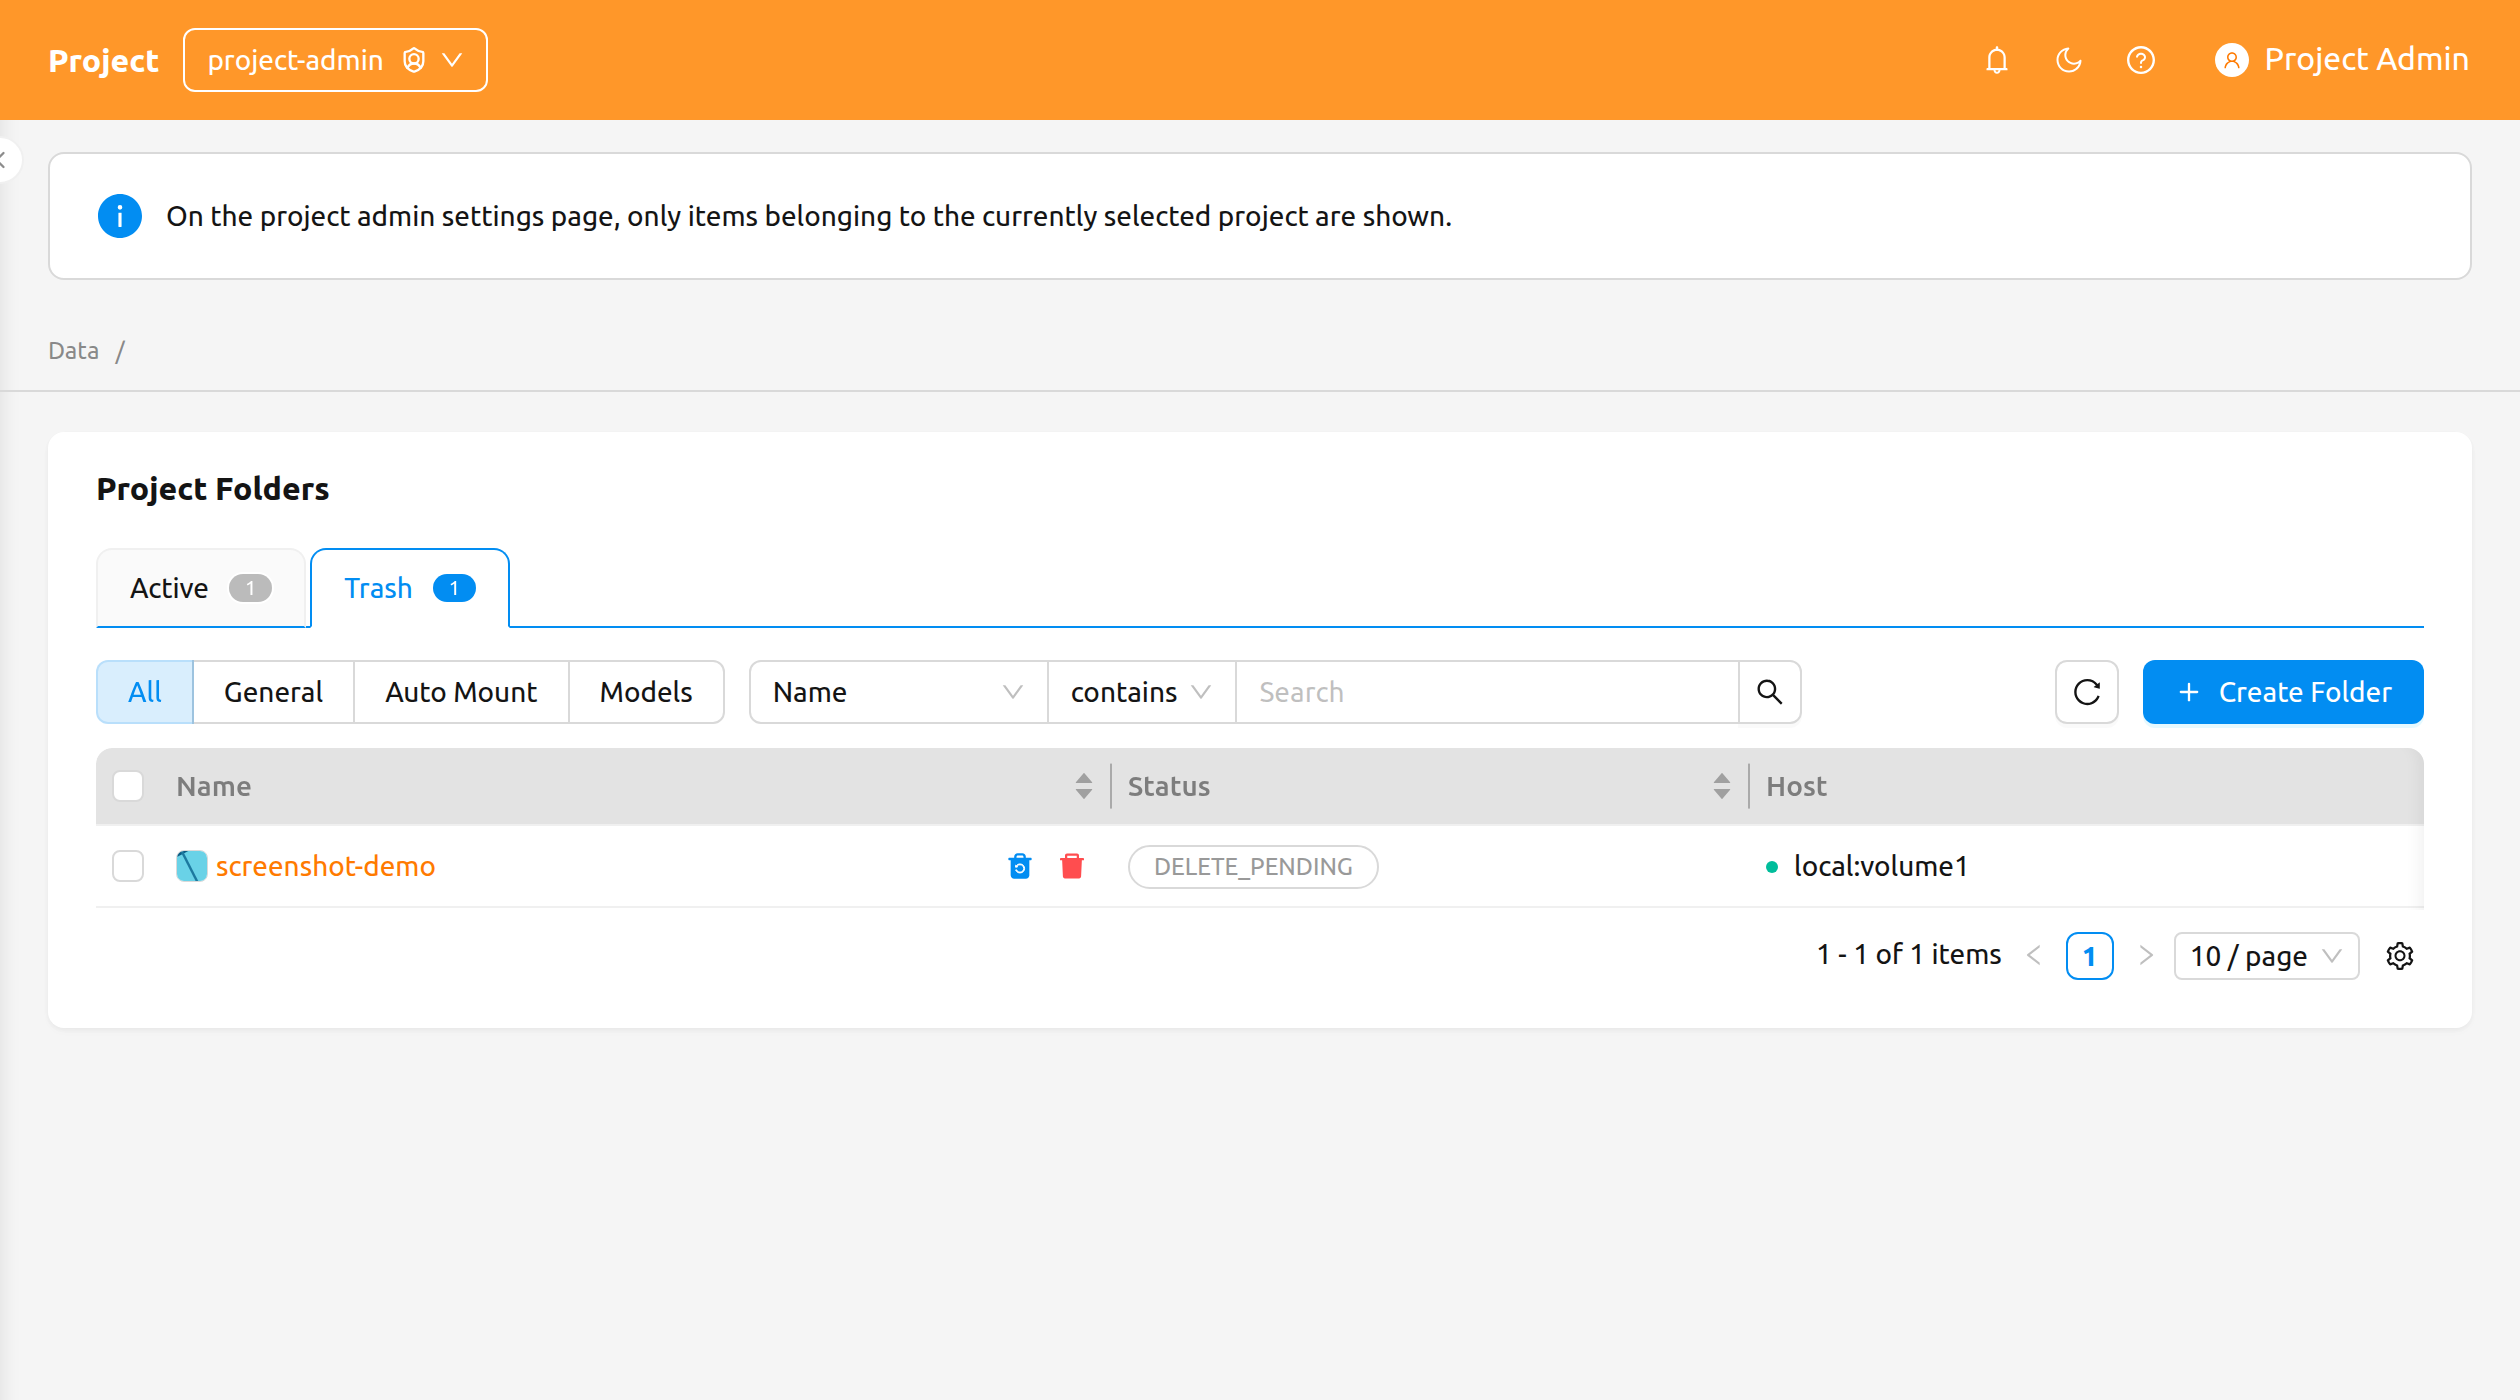
Permanently deleting a storage folder removes all of its contents and cannot be undone. The confirmation modal requires you to type the folder's name before the deletion button becomes enabled.