

Start Page#
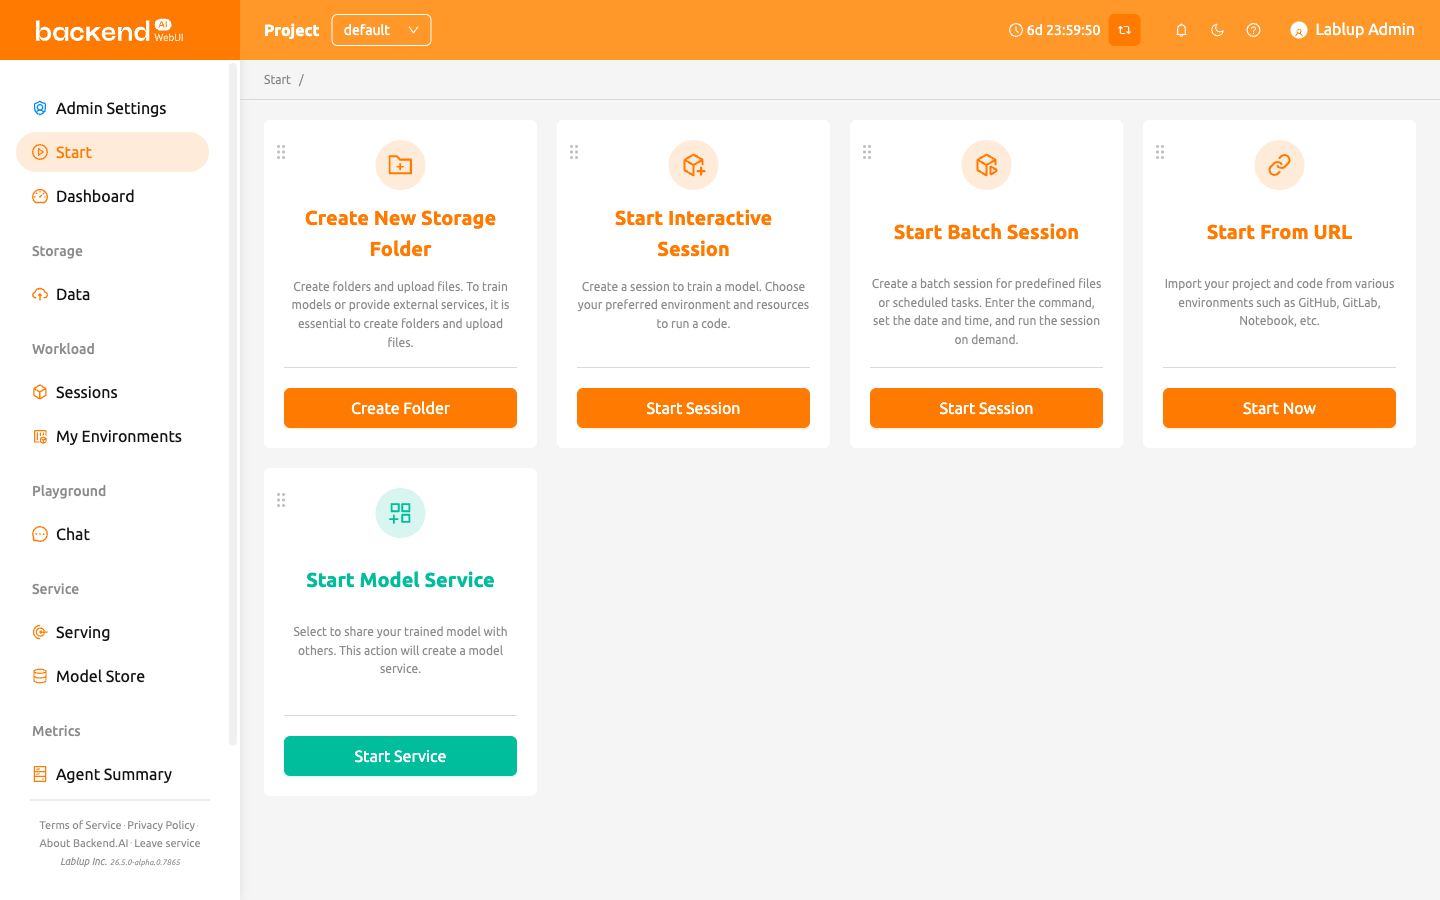
The Start page provides quick access to frequently used WebUI features through action cards. Each card represents a common workflow such as creating storage folders, launching sessions, deploying models, or importing projects from external URLs.
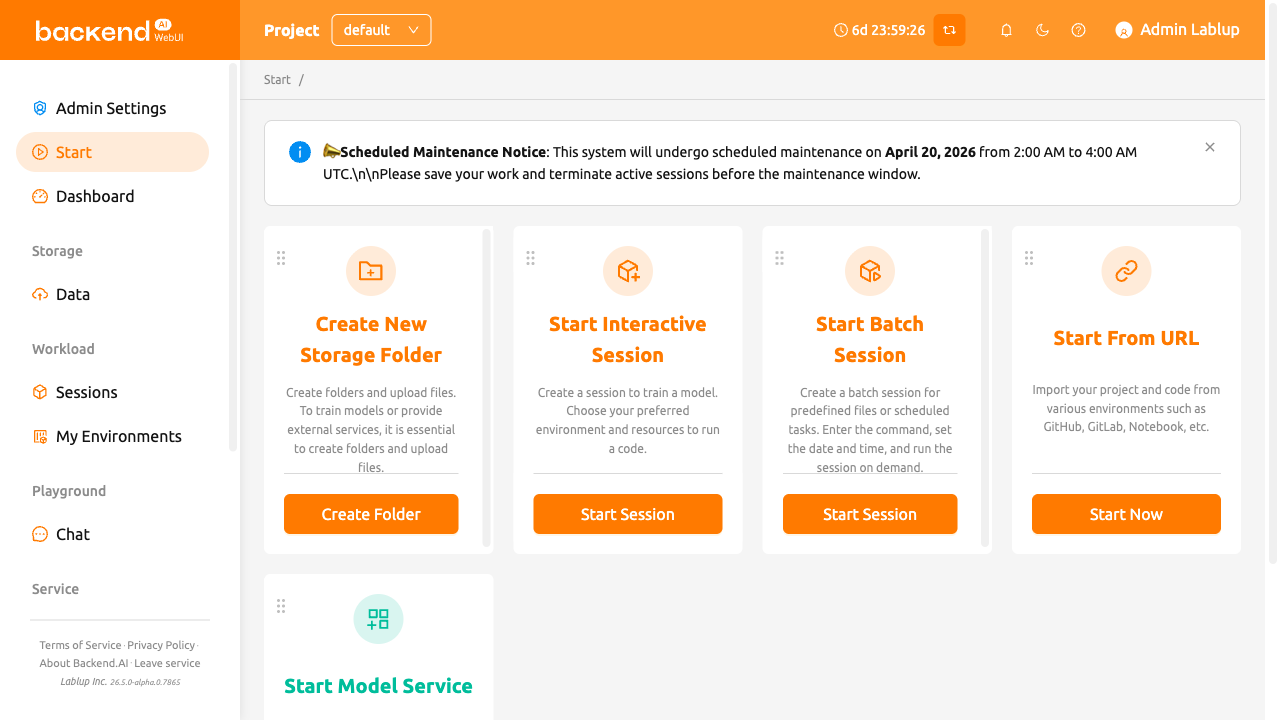
Announcement banner#
If your system administrator has published an announcement, it appears as a banner at the top of the Start page. The announcement supports Markdown formatting and may contain important notices about system maintenance, updates, or usage guidelines. You can dismiss the banner by clicking the close icon.
Action cards#
The Start page displays the following action cards by default:
- Create New Storage Folder: Create a storage folder and upload files. This is an essential first step for training models or providing external services. Clicking the button opens the folder creation dialog.
- Start Interactive Session: Create a session to train a model. Choose your preferred environment and resources to run your code.
- Start Batch Session: Create a batch session for predefined files or scheduled tasks. Enter the command, set the date and time, and run the session on demand.
- Start Deployment: Share a trained model with others by creating a deployment.
- Start From URL: Import your project and code from various environments such as GitHub, GitLab, or Jupyter Notebooks via URL.
Depending on the server configuration, some cards such as the deployment card may not be available. If you want to use these features, please contact your system administrator.
Start from URL#
The Start From URL card allows you to import and run projects directly from external sources. Clicking the card opens a dialog with one tab per import source: Import Notebook, Import GitHub Repository, and Import GitLab Repository. An additional Import Hugging Face Model tab appears when the experimental Hugging Face import is turned on.
Import notebook#
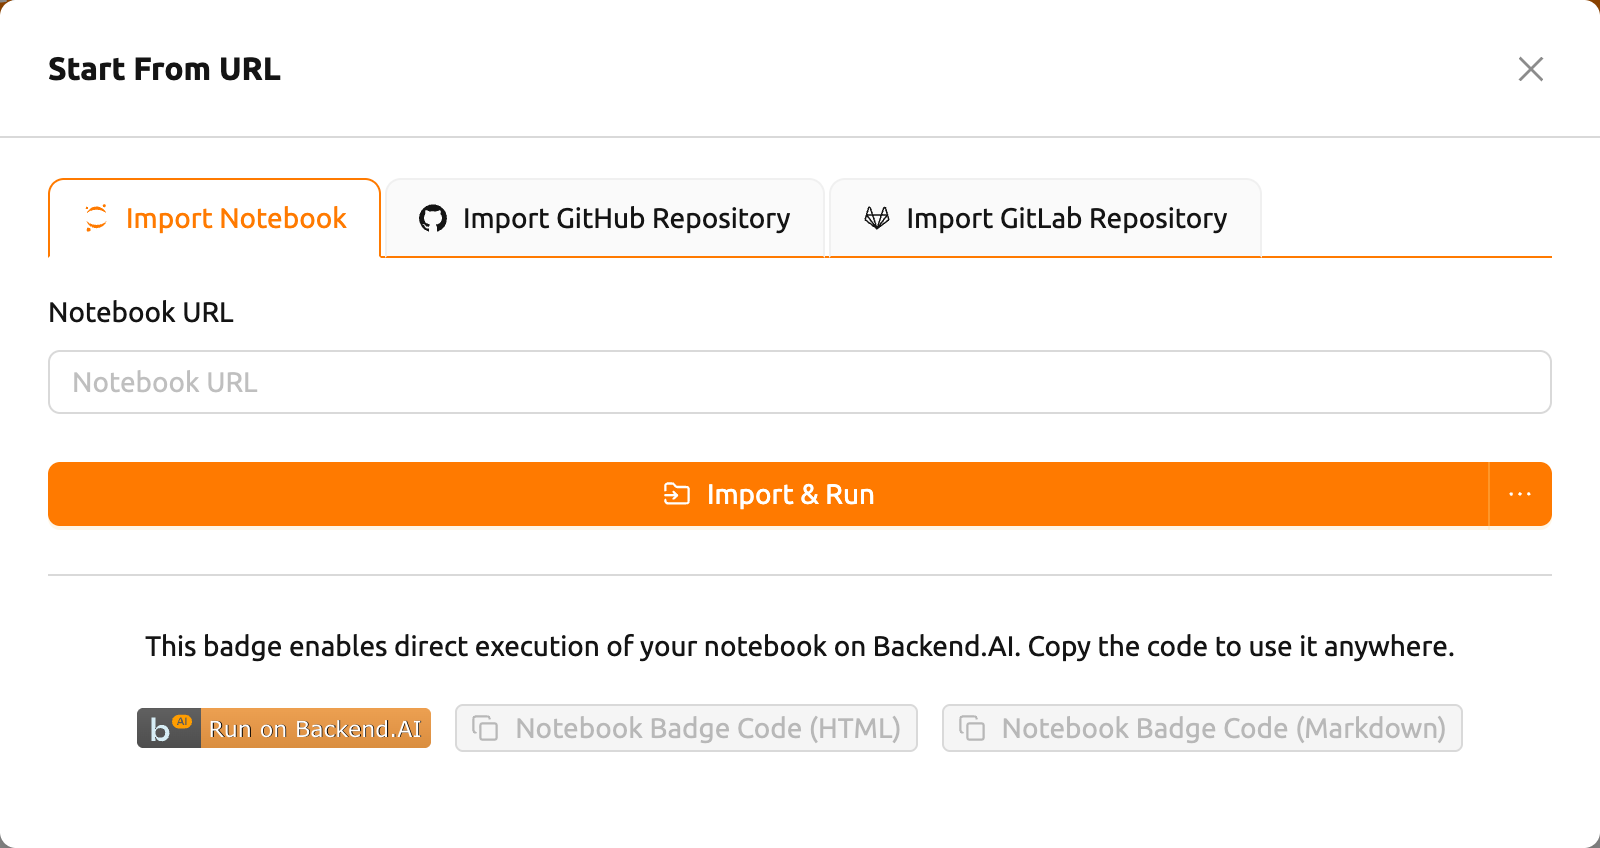
Enter a Jupyter Notebook URL (must end with
.ipynb) in the Notebook URL fieldClick Import & Run to automatically create a session and open the notebook in Jupyter
You can also click the dropdown arrow next to the button and select Start with options to customize the session environment before launching.
The notebook is downloaded from inside the compute session (its bootstrap
script runs curl -O <url>), so the URL must be reachable from the session.
Local addresses such as localhost or 127.0.0.1 resolve to the session
container itself — not your own machine — and will not work. Use a URL that is
reachable from the compute session.
Turn off your browser's pop-up blocker so the running notebook window can open automatically. If there are not enough resources to start the session, the imported notebook will not run.
At the bottom of the tab, you can generate a "Run on Backend.AI" badge code. Copy the HTML or Markdown badge code to embed a direct-launch link in your project documentation.
You must be logged in before generating the badge code. Otherwise, log in first and try again.
Import GitHub repository#
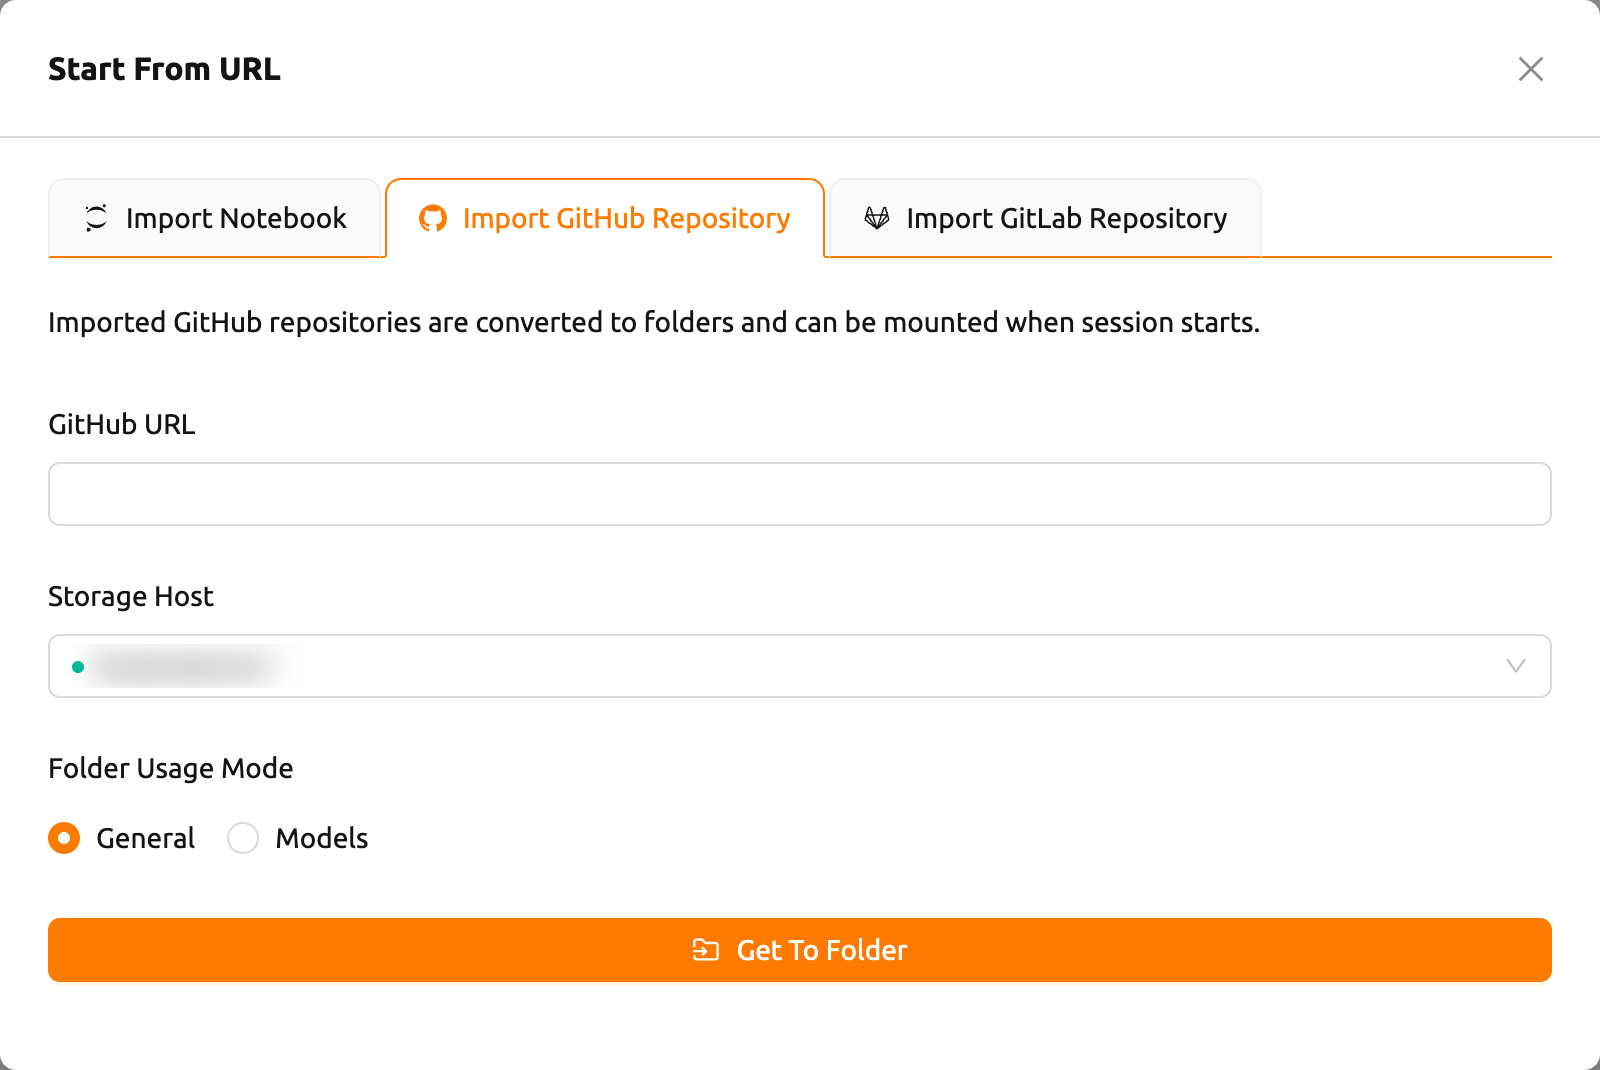
- Enter a valid GitHub repository URL in the GitHub URL field
- Select a Storage Host where the repository will be saved
- Optionally set the Folder Usage Mode (General or Models)
- Click Get To Folder to clone the repository into a new storage folder
The imported repository is converted to a storage folder that can be mounted when starting a session.
Import GitLab repository#
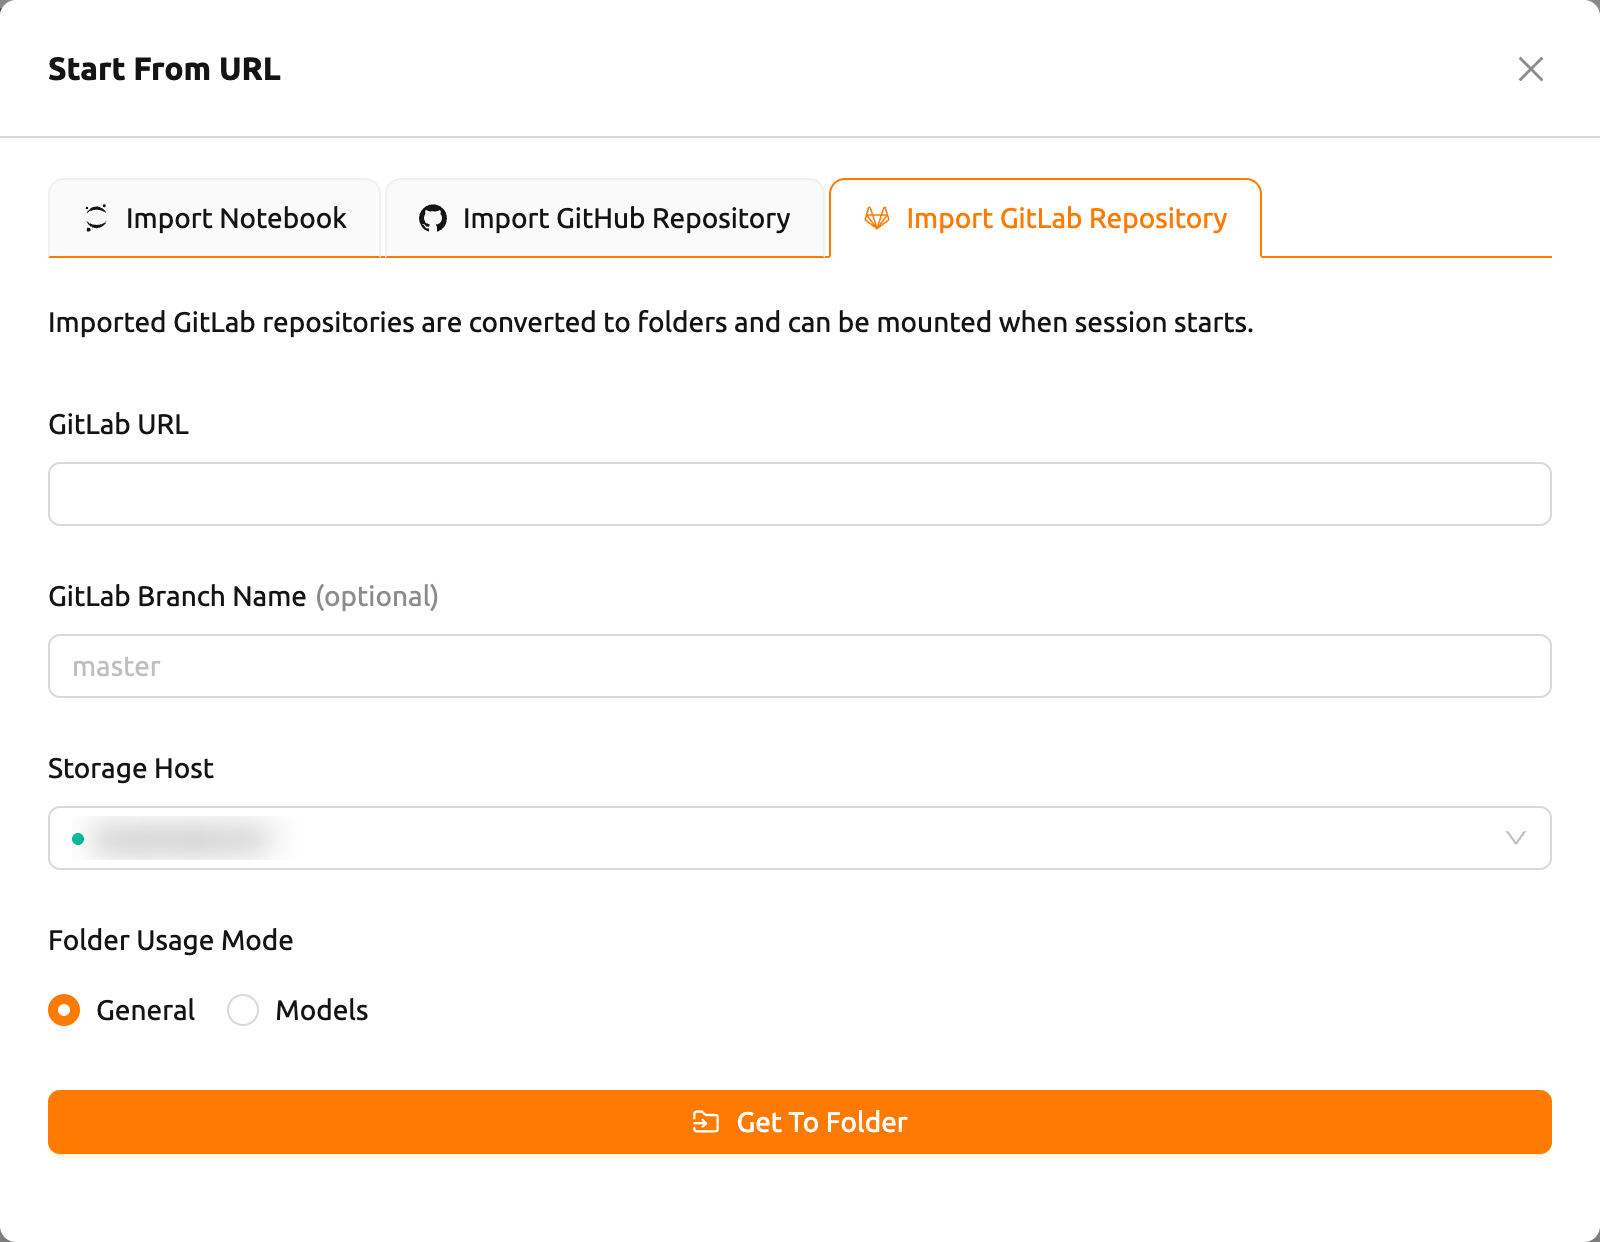
- Enter a valid GitLab repository URL in the GitLab URL field
- Optionally specify a GitLab Branch Name (defaults to
master) - Select a Storage Host where the repository will be saved
- Optionally set the Folder Usage Mode (General or Models)
- Click Get To Folder to clone the repository into a new storage folder
Import Hugging Face Model#
The Import Hugging Face Model tab downloads a model from Hugging Face into one of your model folders, so you can later mount it in a compute session or serve it as a deployment.
This tab is hidden until you turn on Import from Hugging Face in the Experimental features section of the User Settings page. Experimental features may change or be removed in future updates.
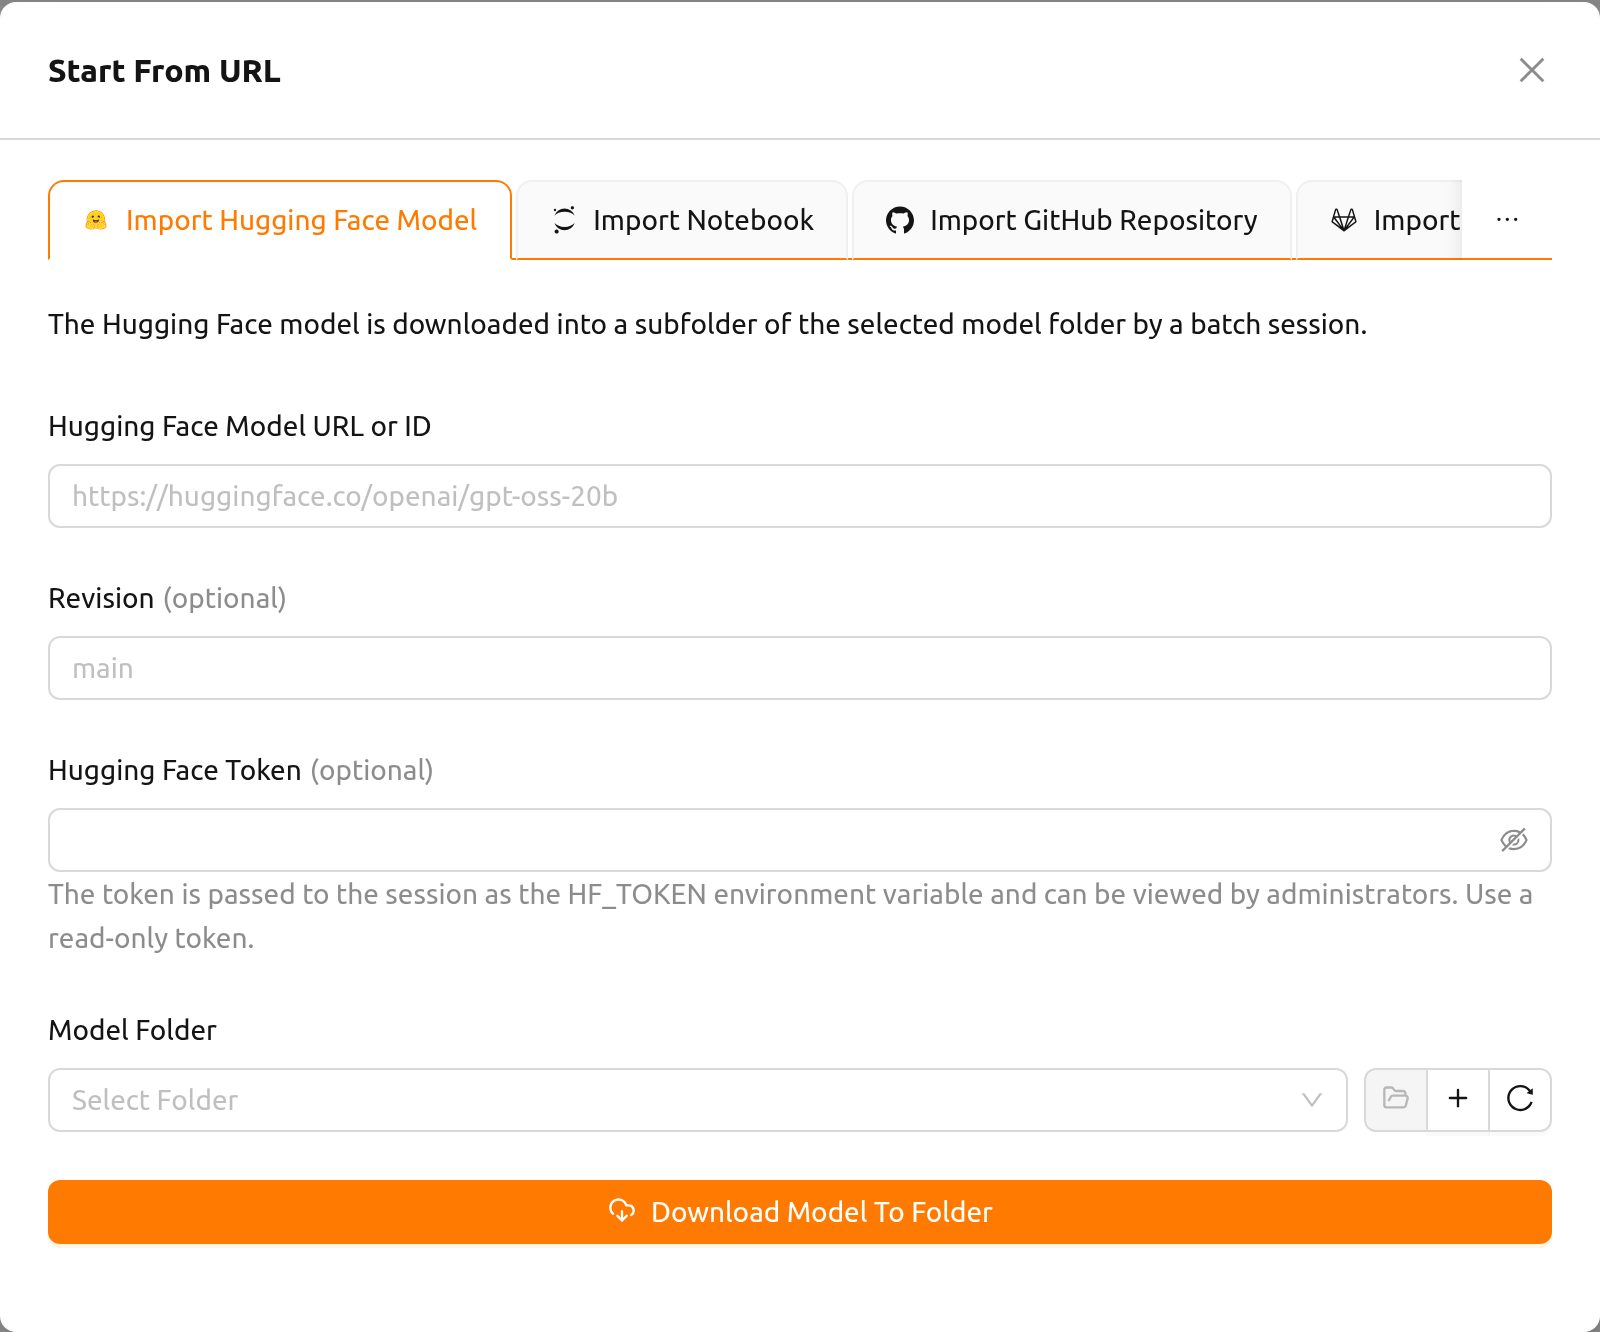
- Enter the model in the Hugging Face Model URL or ID field. Both a model
page URL such as
https://huggingface.co/openai/gpt-oss-20band a plain model ID such asopenai/gpt-oss-20bare accepted. Addresses that point to a dataset, a space, or any other non-model page are rejected. - Optionally enter a Revision — the branch, tag, or commit of the model repository to download. Leave it empty to download the default revision. If the address you entered already contains a revision, that revision is used.
- Optionally enter a Hugging Face Token. A token is required for gated or private models.
- Select the Model Folder to download into. As the helper text under the field notes, only model folders in the current project that you can mount with write permission are listed — the download session writes into the folder, so folders you can only mount read-only are excluded. The buttons next to the selector let you open the selected folder, create a new model folder, and refresh the list. When creating a new folder here, set its mount permission to read & write: a folder created with read-only mount permission cannot receive the download, and a warning tells you to create one with read & write mount permission instead.
- Click Download Model To Folder.
The dialog closes and Backend.AI starts a batch session that performs the download. Because the download runs inside that session, you can follow its progress on the Sessions page; the model is ready once the session finishes successfully. If the session fails, the download did not complete and the model is not ready to use.
The model is stored in a subfolder named after the model, inside the folder you
selected — openai/gpt-oss-20b, for example, is downloaded to gpt-oss-20b/.
Several models can therefore share a single model folder.
The token is passed to the download session as the HF_TOKEN environment
variable and can be viewed by administrators. Use a read-only token.
The tab downloads into model folders, so it is only available when the deployment feature is enabled for your account. Large models take a long time to download and consume the storage quota of the target folder.
Customizing card layout#
You can rearrange the action cards on the Start page by dragging and dropping them. Each card has a drag handle at the top-left corner that you can grab to move the card to a different position.
Your customized card arrangement is automatically saved and persists across browser sessions. The layout is stored per user, so each user can have their own preferred arrangement.