Create a Compute Session with Mounted Folders
When you start a compute session, the user has access to the /home/work/
directory, and the normal directores and files created under /home/work/
will disappear when the compute session is destroyed. This is because compute
sessions are dynamically created and deleted based on the container. To preserve
the data inside the container independent of the life cycle of the container, a
separate host folder must be mounted into the container, and then files must be
created within the mounted folder. Backend.AI provides a function to mount
storage folders when creating a compute session.
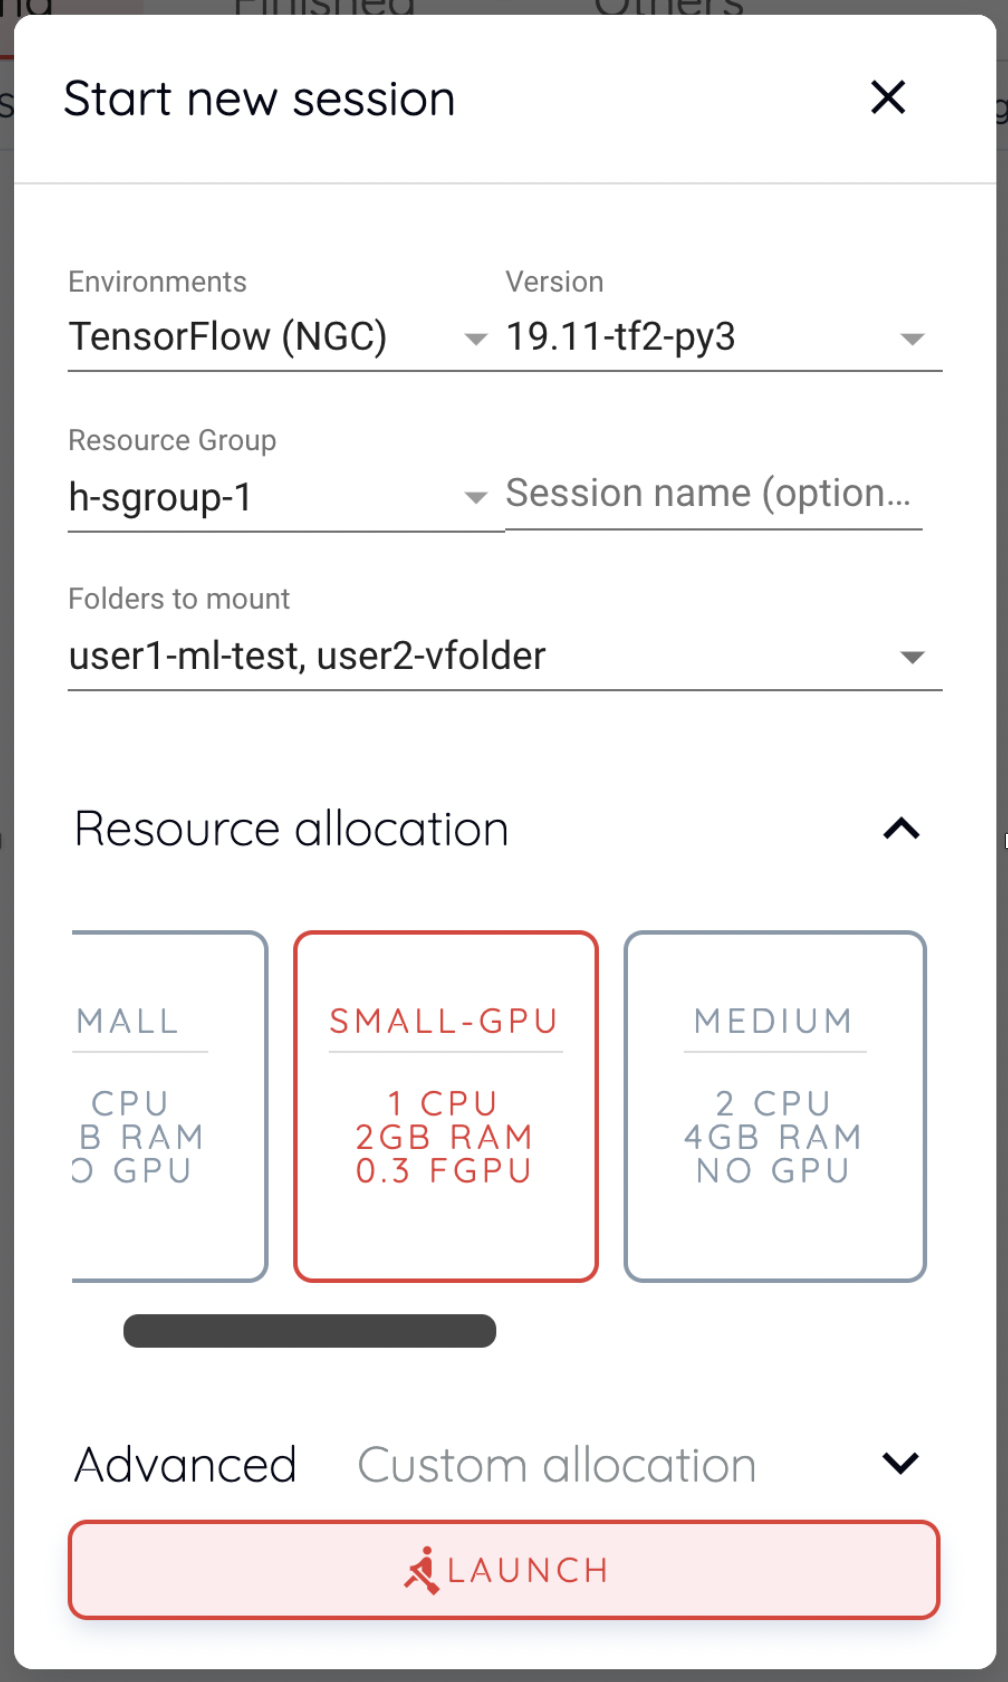
Let’s go to the Sessions page and click the START button to create a new compute
session. In the session create dialog, click Folders to mount to see a list of
storage folders that a user can mount. Among them, you can add them by clicking
the folder you want to mount. You can also mount multiple folders simultaneously
by clicking multiple items. In this example, we will mount two folders,
user1-ml-test and user2-vfolder, and then create a compute session.
Now, open the terminal by clicking the terminal icon in the created session. If
you run ls command in the terminal, you can see that the user1-ml-test
and user2-vfolder folders are mounted under the home directory. Let’s create
a test_file under user2-vfolder to see if the file can be preserved
after the compute session is destroyed. The contents of this file will filled
with “file inside user2-vfolder”.
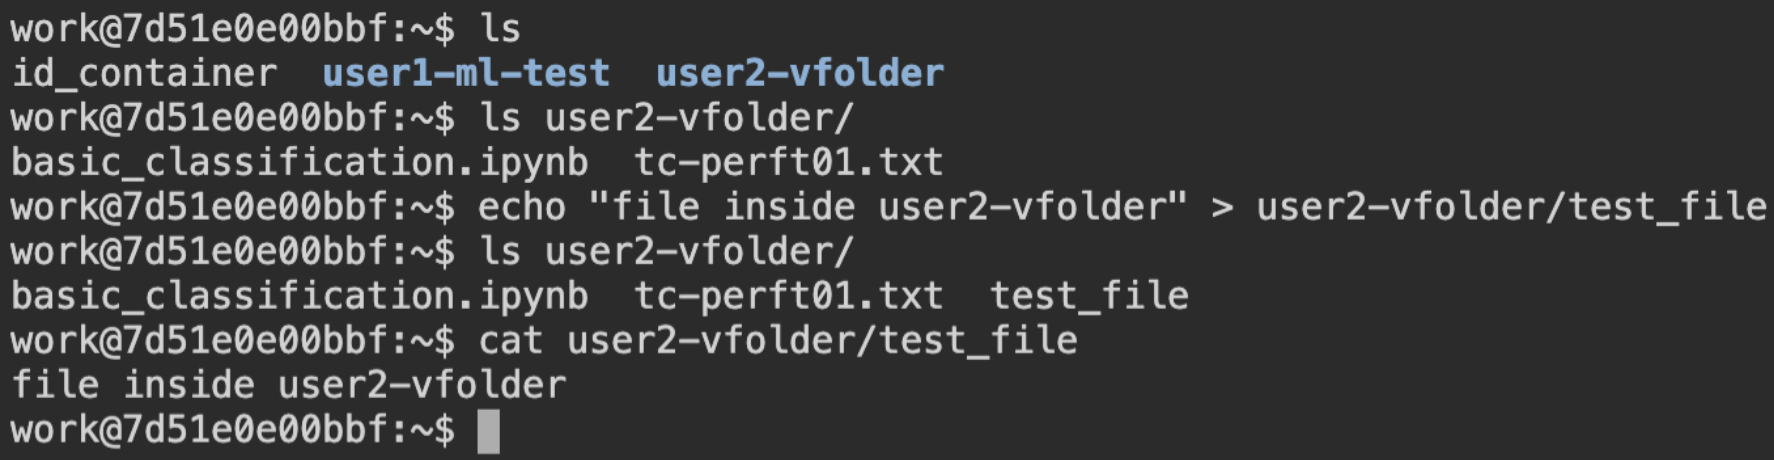
If you run ls command against user2-vfolder, you can see that the file
was created successfully. Also note the contents of the file with the cat
command.
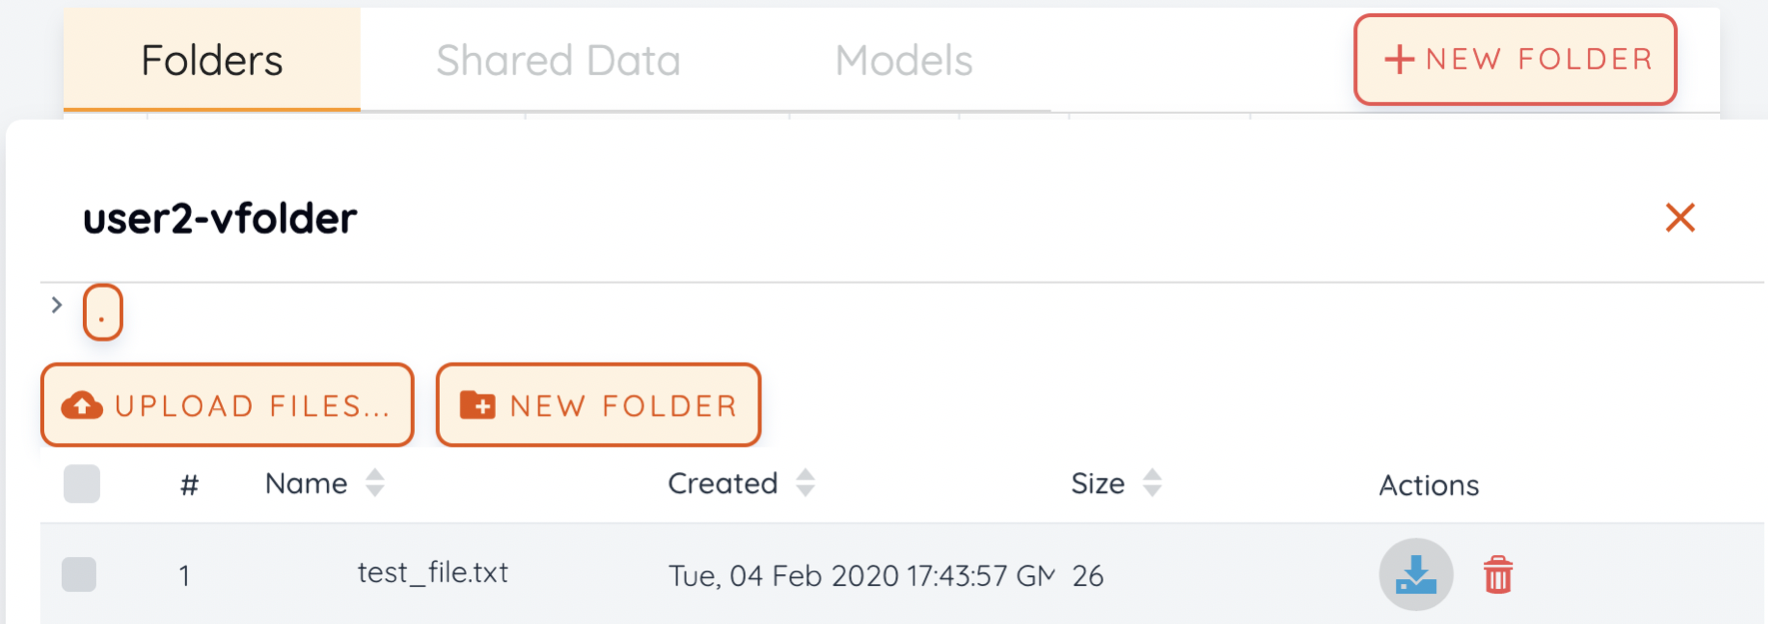
Now delete the compute session and go to the Storage page. Locate the
user2-vfolder folder, open a file explorer and check that the file
test_file exists. Click the file download button in Actions to download the
file to the local machine and open it in an editor to confirm that the contents
of the file are “file inside user2-vfolder”.
Like this, when creating a compute session, you can mount storage folders and perform any file operations on those mounted folders to save data even after the compute session termination.
Configuring a compute session environment using an automount folder
Sometimes you need a new program or library that is not pre-installed in a compute session. In that case, you can install packages and configure a certain environment regardless of the type of compute session by using the Storage folder, which persists independent of session lifecycle, and the automount folder.
Install Python packages via pip
Creating a folder named .local allows a user to install Python user packages
in that folder. This is because installing a package with the –-user option
appended to pip installs the package in the .local folder under the
user’s home folder (note that automount folder is mounted under user’s home
folder). So, if you want to install and keep the Python package tqdm
regardless of the type of computing environment, you can issue the following
command in your terminal:
pip install --user tqdm
After that, when a new compute session is created, the .local folder where
the tqdm package is installed is automatically mounted, so you can use the
tqdm package without reinstalling.
Warning
If you spawn multiple sessions that uses multiple Python versions, there may
be compatibility issues with the packages. This can be circumvented by
branching PYTHONPATH environment variable via the .bashrc. This is
because the user’s pip package is installed in the path specified in the
PYTHONPATH.
Install packages via Homebrew
Package managers like Ubuntu’s apt or CentOS’s yum usually require
sudo permissions. For security, sudo and root accesses are blocked
by default in Backend.AI’s compute session (it may allowed depending on the
configuration), so we recommend to use Homebrew on Linux which does not require sudo.
Homebrew can be installed and used in the following ways:
- Create
.linuxbrewfolder in Data & Storage page - Create a compute session (
.linuxbrewfolder is automatically mounted) - Install Homebrew on Linux
sh -c "$(curl -fsSL https://raw.githubusercontent.com/Linuxbrew/install/master/install.sh)"
export PATH=/home/work/.linuxbrew/bin:$PATH
brew
- Install package
brew install fortune
fortune
You can manage various settings using the automount folder in the same way as above. More details can be found on the Backend.AI wiki.