Using Compute Session
In addition to see the list of compute sessions, Sessions tab lets you start new sessions or use and manage already running sessions.
Start a new session
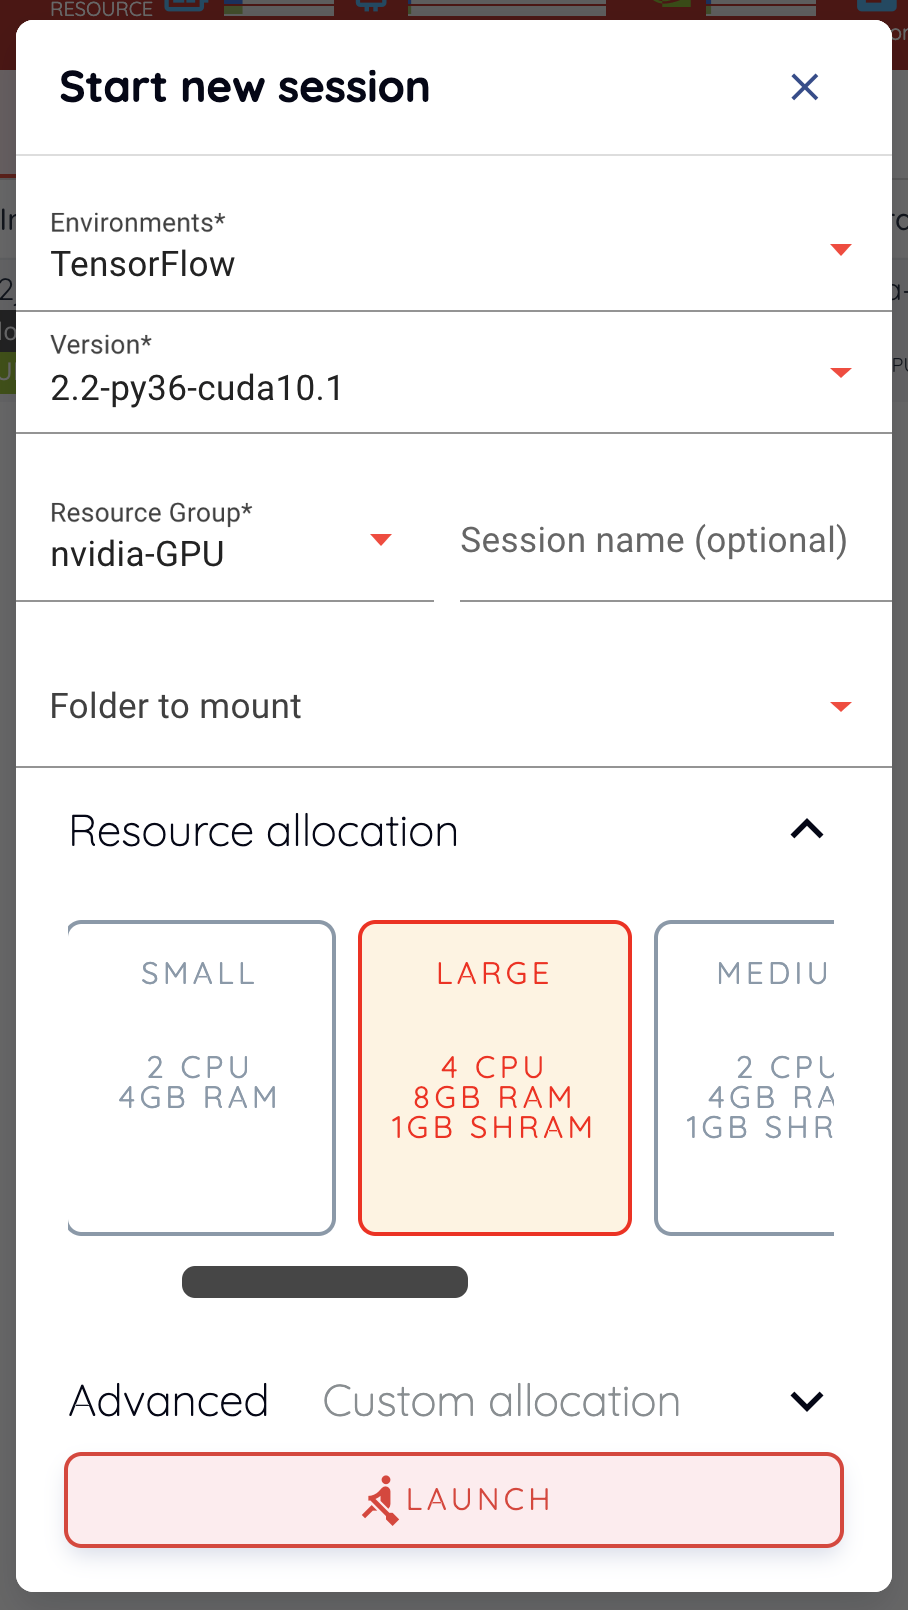
Click START button to start a new compute session. The following setup dialog will appear. Specify the language environment (Environments, Version), the amount of resources (CPU, RAM, GPU, etc.) you want to use, and then press the LAUNCH button.
Note
If the GPU resource is marked as FGPU, this means that the server is serving the GPU resources in a virtualized form. Backend.AI supports GPU virtualization technology that a single physical GPU can be divided and shared by multiple users for better utilization. Therefore, if you want to execute a task that does not require a large amount of GPU computation, you can create a compute session by allocating only a portion of a GPU. The amount of GPU resources that 1 FGPU actually allocates may vary from system to system depending on the administrator’s setting. For example, if administrator has set to split one physical GPU into five pieces, 5 FGPU means 1 physical GPU, or 1 FGPU means 0.2 physical GPU. At this configuration, if you create a compute session by allocating 1 FGPU, you can utilize SM (streaming multiprocessor) and GPU memory corresponding to 0.2 physical GPU for the session.
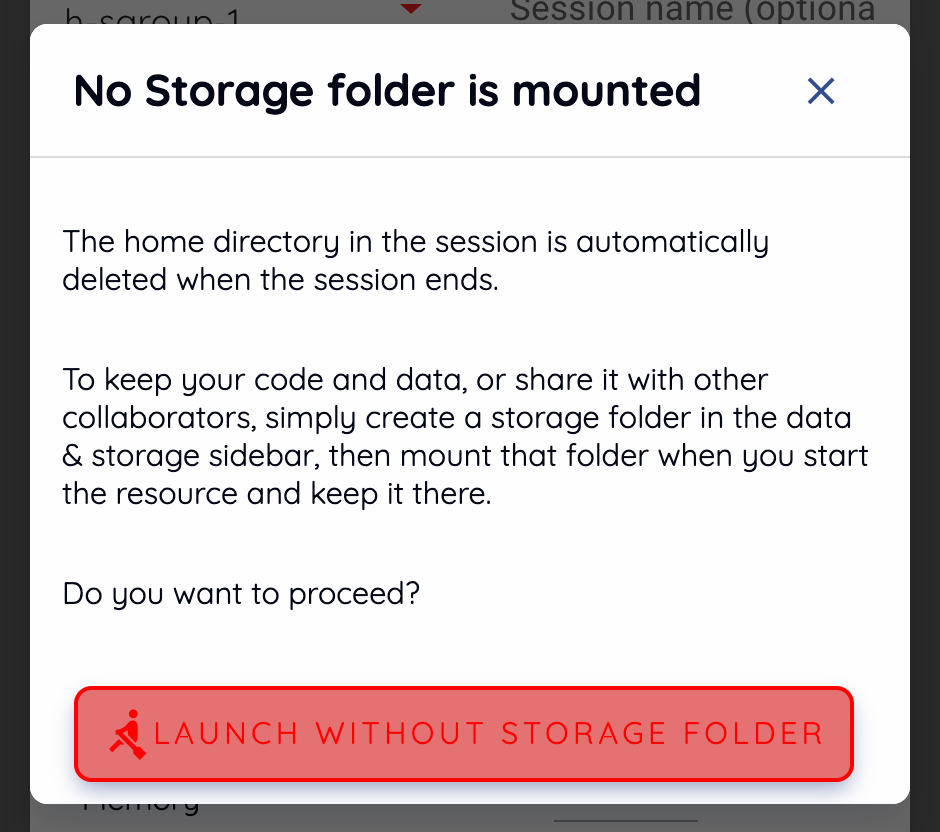
If no mount folder is specified in “Folders to mount”, the following notification dialog may appear. It is recommended that one or more storage folders to be mounted because terminating compute session by default deletes all the data inside the session. If you specify a mount folder and save your data in that folder, you can keep the data even if the compute session is destroyed. Data preserved in the storage folder can also be reused by re-mounting it when creating another compute session. You can ignore the alarm and create a session. However, it’s a good idea to mount a folder if you’re working on a job that requires you to keep data from within a session. For information on how to mount a folder and run a compute session, see Related Content.
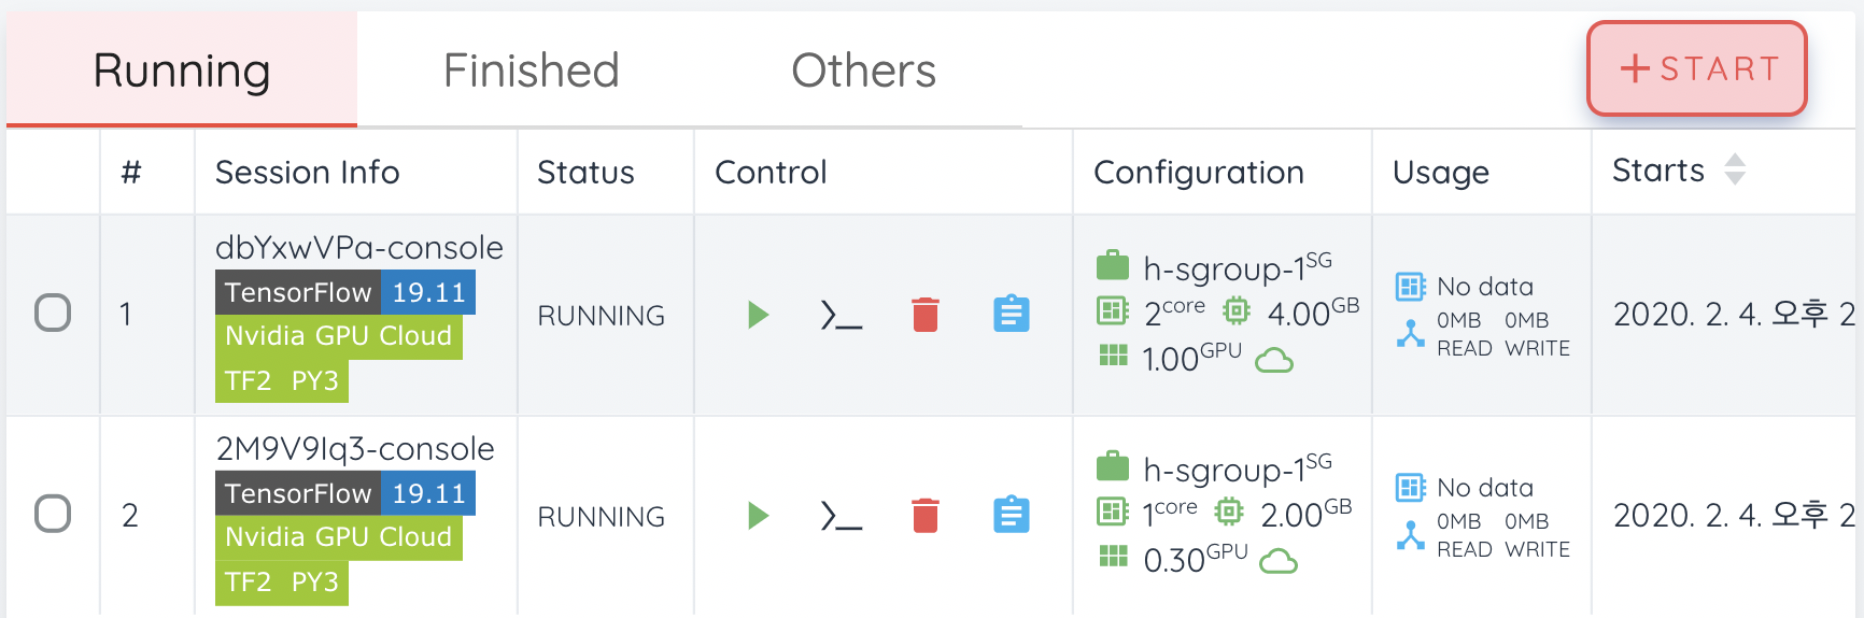
Notice that a new compute session is created in the Running tab.
Use and Manage Running Session
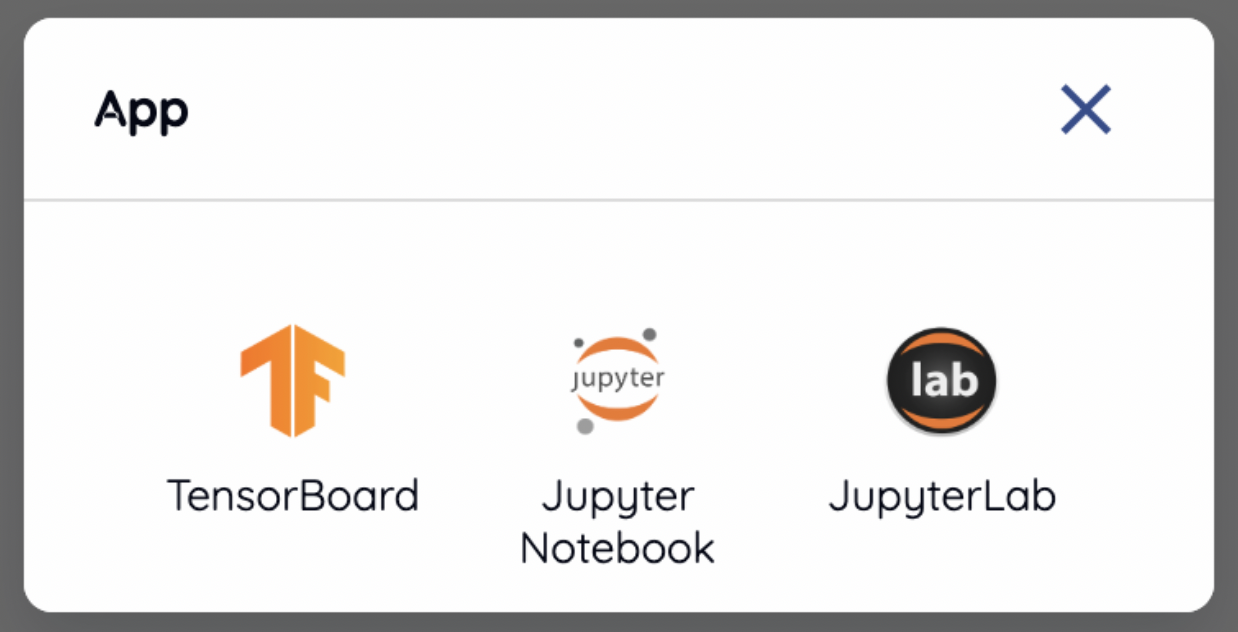
This time, let’s take a look at how to use and manage a running compute session. If you see the Control column in the session list, there are several icons. When you click the first icon, several app services supported by the session will appear as shown in the following figure.
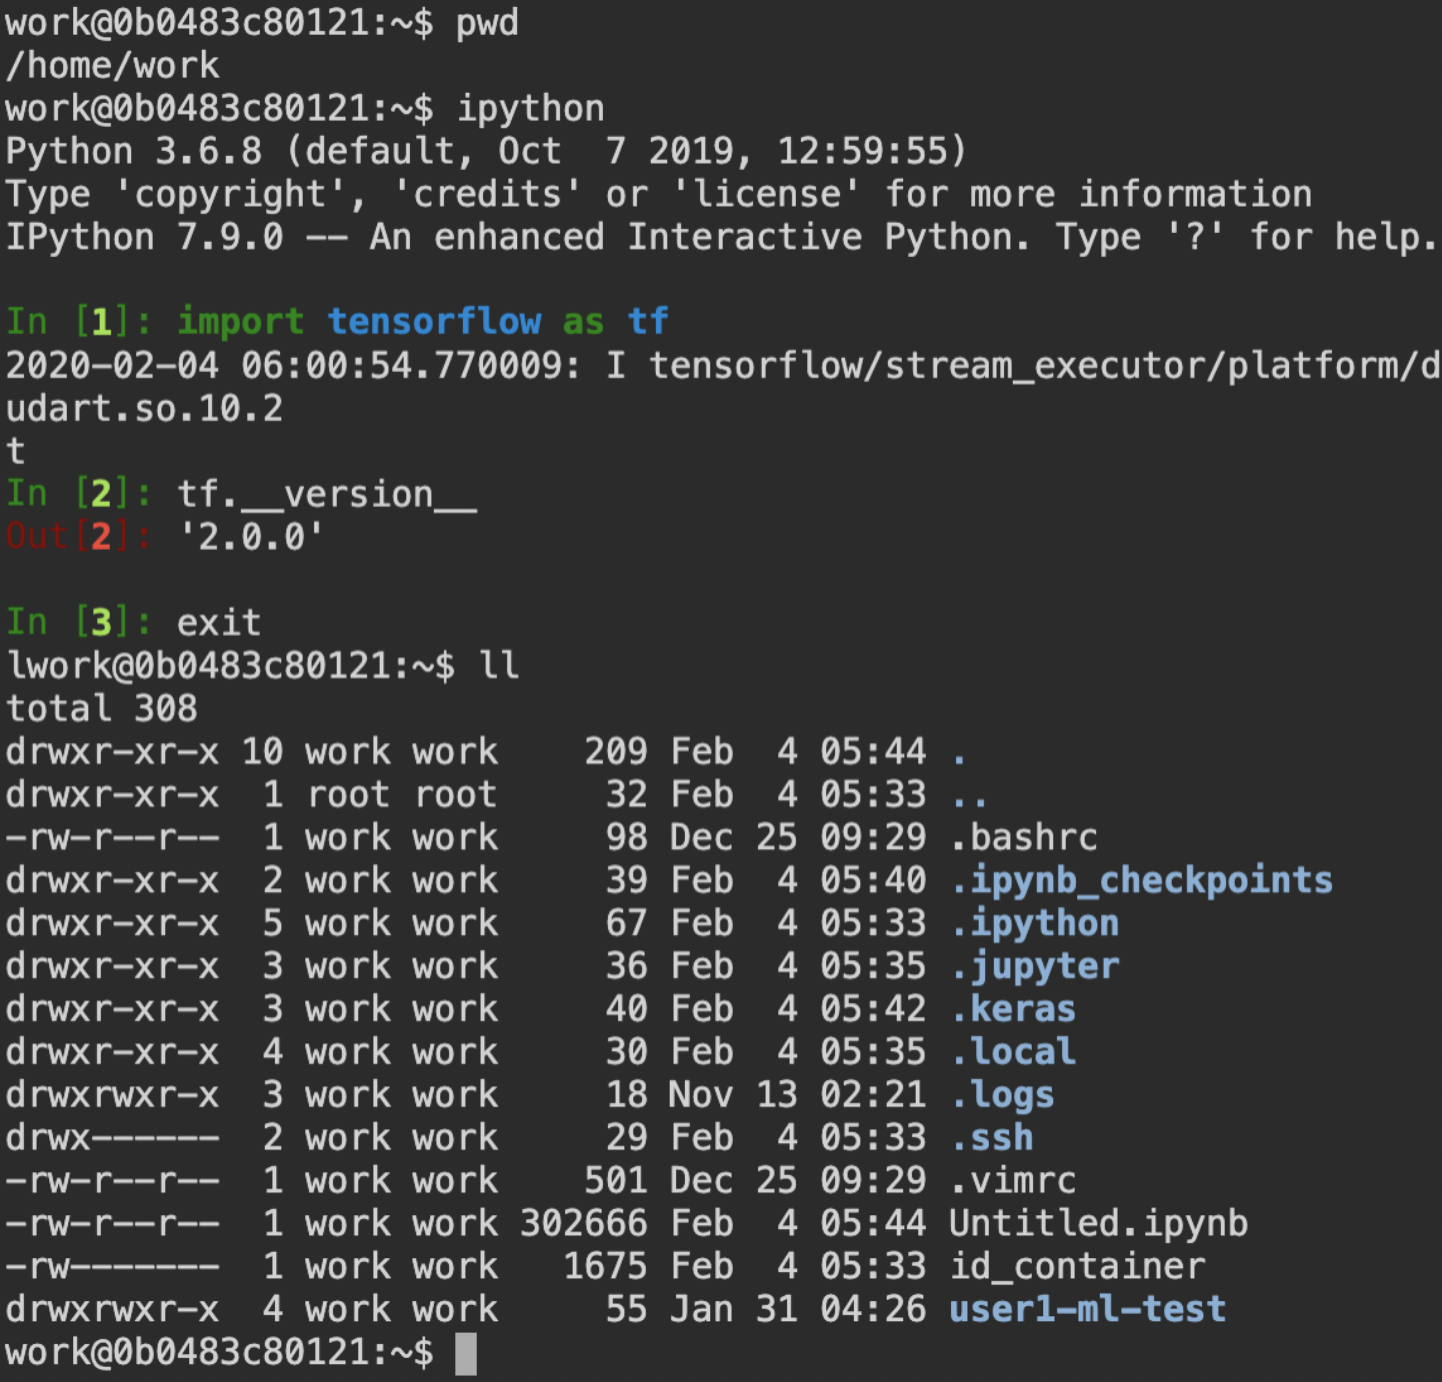
As a test, let’s click on Jupyter Notebook.
You will see a new window pop up and Jupyter Notebook is running. This Notebook was created inside the running compute session, and it’s easy to use with just a click of a button without any setup. In addition, you can just use the language environment and libraries provided by the compute session as is, so there is no need to install a separate packages. For more information on how to use Jupyter Notebook, please refer to the official documentation.
In the notebook’s file explorer, the id_container file contains a private
SSH key. If necessary, you can download it and use it for SSH / SFTP access to
the container.
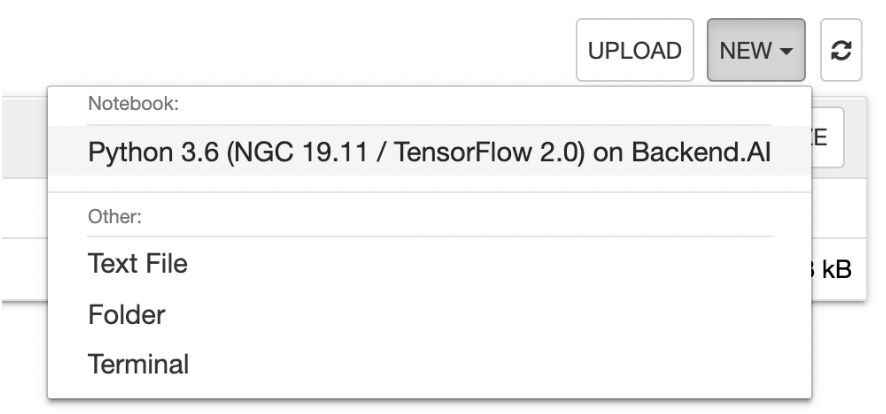
Click the NEW button on the upper right corner and select Notebook for Backend.AI, and ipynb window will pop up where you can enter the new code.
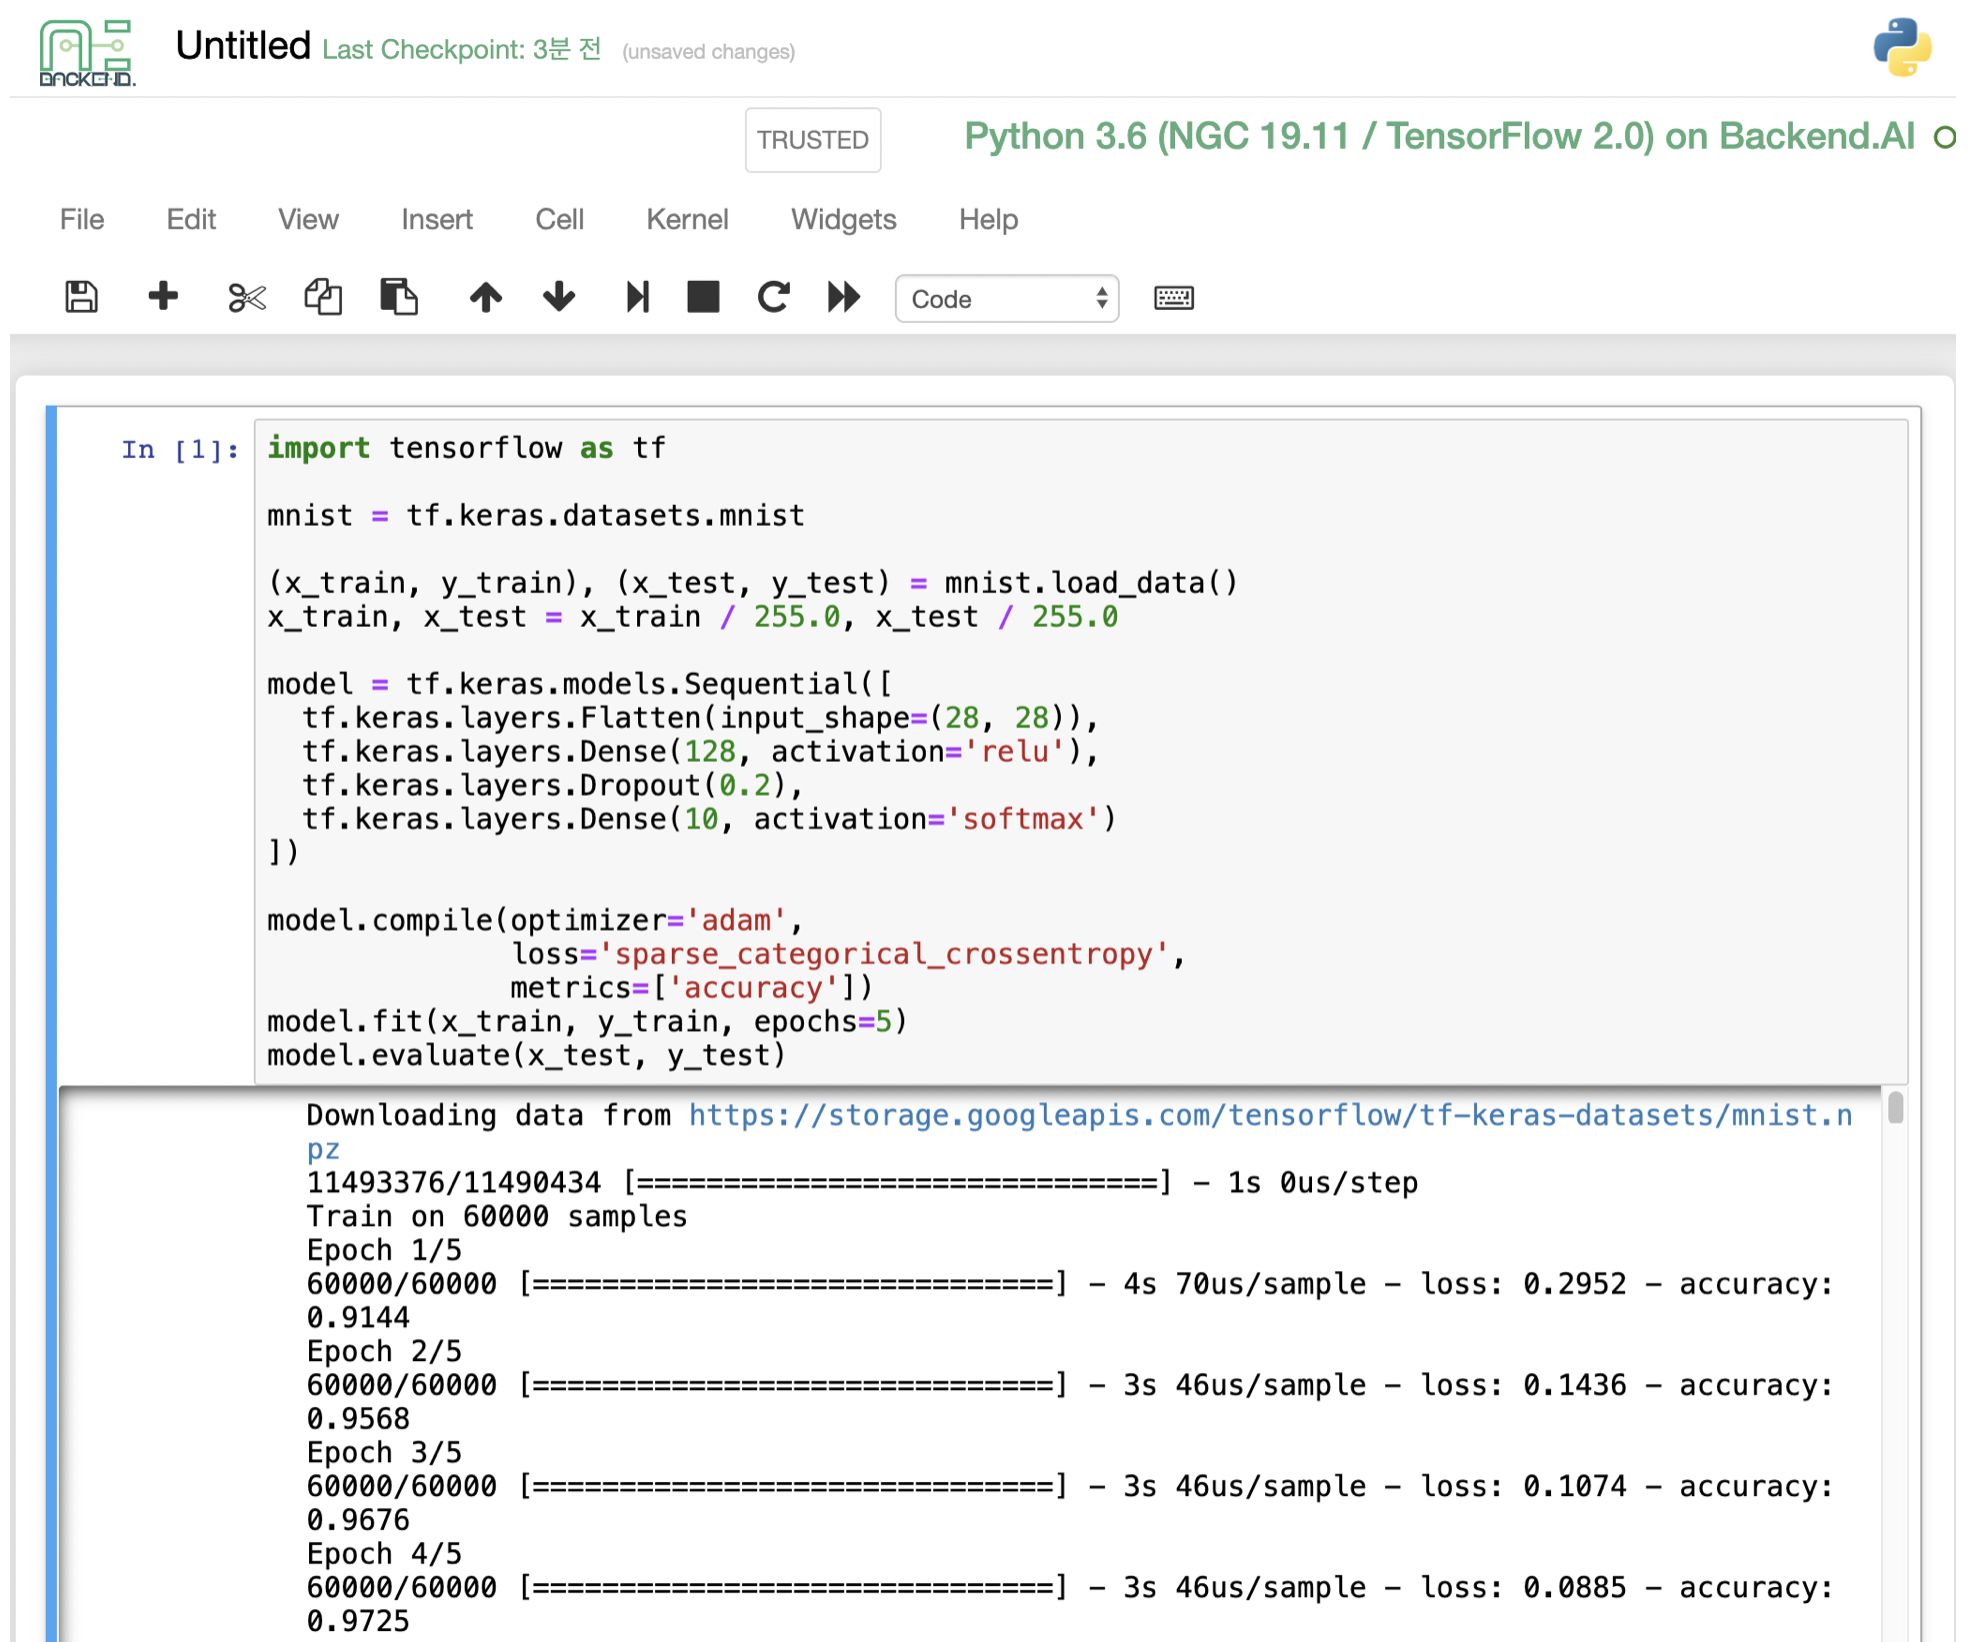
In this window, you can enter and execute any code you want by using the environment that session provides. The code execution happens on one of the Backend.AI nodes where the compute session is actually created, and there is no need to configure a separate environment on the local machine.
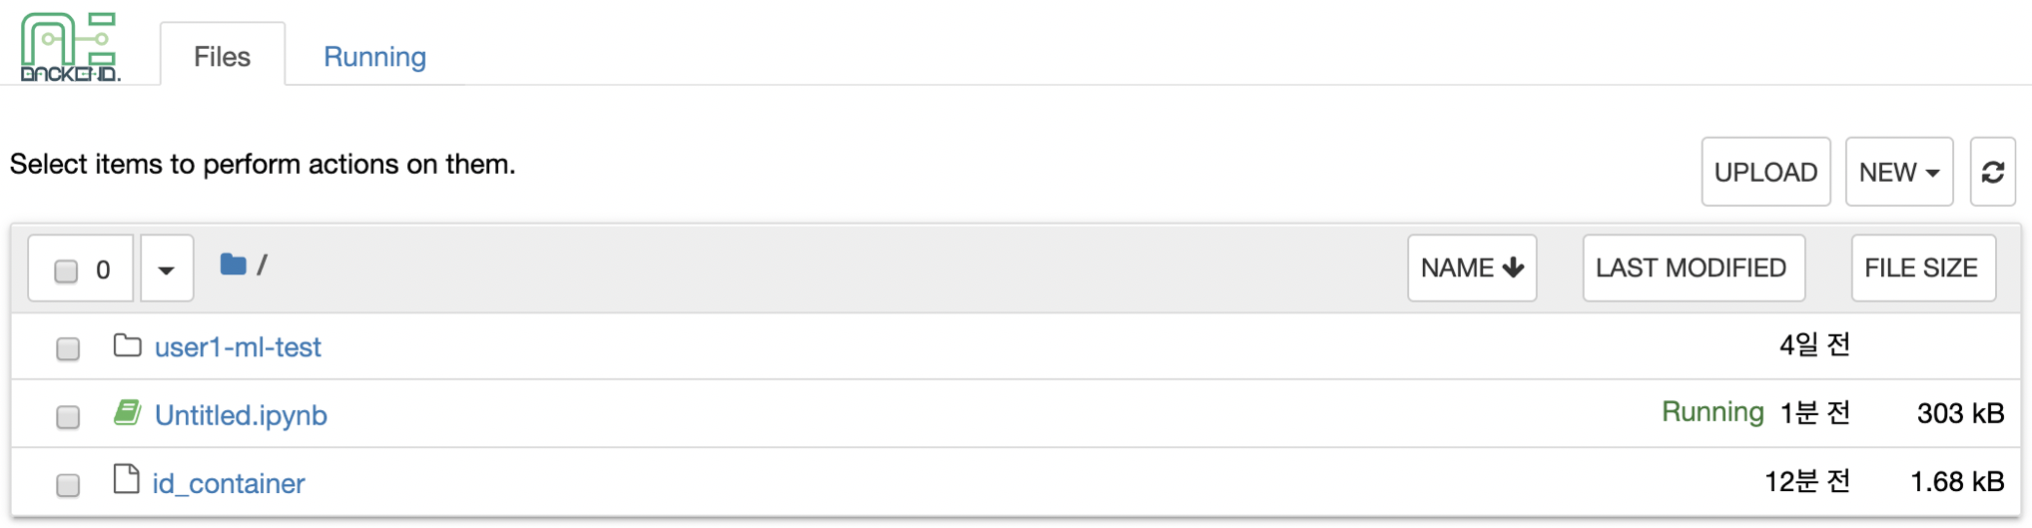
When you close the window, you can notice that the Untitled.ipynb file is
created in the Notebook File Explorer. Note that the files created here are
deleted when you destroy the session. The way to preserve those files even when
the session is gone is described in the Storage/Folders section.
Return to the Session list page. This time, let’s launch the terminal. Click the terminal icon (the second button) to use the container’s ttyd daemon. The terminal will also appear in a new window, and you can type commands, just like any usual terminal, which will be delivered to the compute session as shown in the following figure. If you are familiar with using command-line interface (CLI), you can easily interact with Linux commands.
If you create a file here, you can immediately see it in the Jupyter Notebook you opened earlier as well. Conversely, changes made to files in Jupyter Notebook can also be checked right from the terminal. This is because they are using the same files in the same compute session.
In addition, you can use web-based services such as TensorBoard, Jupyter Lab, etc., depending on the type of services provided by the compute session.
To delete a specific session, tap the red trash icon. Since the data in the folder inside the compute session is deleted as soon as the compute session ends, it is recommended that you move the data to the mounted folder or upload it to the folder from the beginning if you want to keep it.
Advanced Web Terminal Usage
The web-based terminal we used above internally embed a utility called tmux. tmux is a terminal multiplexer that supports to open multiple shell windows within a single shell, so as to allow multiple programs to run in foreground simultaneously. If you want to take advantage of more powerful tmux features, you can refer to the official tmux documentation and other usage examples on the Internet.
Here we are introducing some simple but useful features.
Copy terminal contents
tmux offers a number of useful features, but it’s a bit confusing for first-time
users. In particular, tmux has its own clipboard buffer, so when copying the
contents of the terminal, you can suffer from the fact that it can be pasted
only within tmux by default. Furthermore, it is difficult to expose user
system’s clipboard to tmux inside web browser, so when using tmux, the terminal
contents cannot be copied and pasted to other programs of user’s computer. The
so-called Ctrl-C / Ctrl-V is not working.
If you need to copy and paste the terminal contents to your system’s clipboard,
you can temporarily turn off tmux’s mouse support. First, press Ctrl-B key
to enter tmux control mode. Then type :set -g mouse off and press Enter
(note that you have to type the first colon as well). You can check what you are
typing in the status bar at the bottom of the screen. Then drag the desired text
from the terminal with the mouse and press the Ctrl-C or Cmd-C (in Mac)
to copy them to the clipboard of the user’s computer.
With mouse support turned off, you cannot scroll through the mouse wheel to see
the contents of the previous page from the terminal. In this case, you can turn
on mouse support again. Press Ctrl-B, and this time, type :set -g mouse
on. Now you can scroll mouse wheel to see the contents of the previous page.
If you remember :set -g mouse off or :set -g mouse on after Ctrl-B,
you can use the web terminal more conveniently.
Note
Ctrl-B is tmux’s default control mode key. If you set another control key
by modifying .tmux.conf in user home directory, you should press the set
key combination instead of Ctrl-B.
Checking the terminal history using keyboard
There is also a way to copy the terminal contents and check the previous
contents of the terminal simultaneously. It is to check the previous contents
using the keyboard. Again, click Ctrl-B first, and then press the Page
Up and/or Page Down keys. You can see that you navigate through the
terminal’s history with just keyboard. To exit search mode, just press the q
key. With this method, you can check the contents of the terminal history even
when the mouse support is turned off to allow copy and paste.
Spawn multiple shells
The main advantage of tmux is that you can launch and use multiple shells in one
terminal window. Since seeing is believing, let’s press the Ctrl-B key and
then the c. You can see that the contents of the existing window disappeared
and a new shell environment appeared. Then, did the previous window terminated?
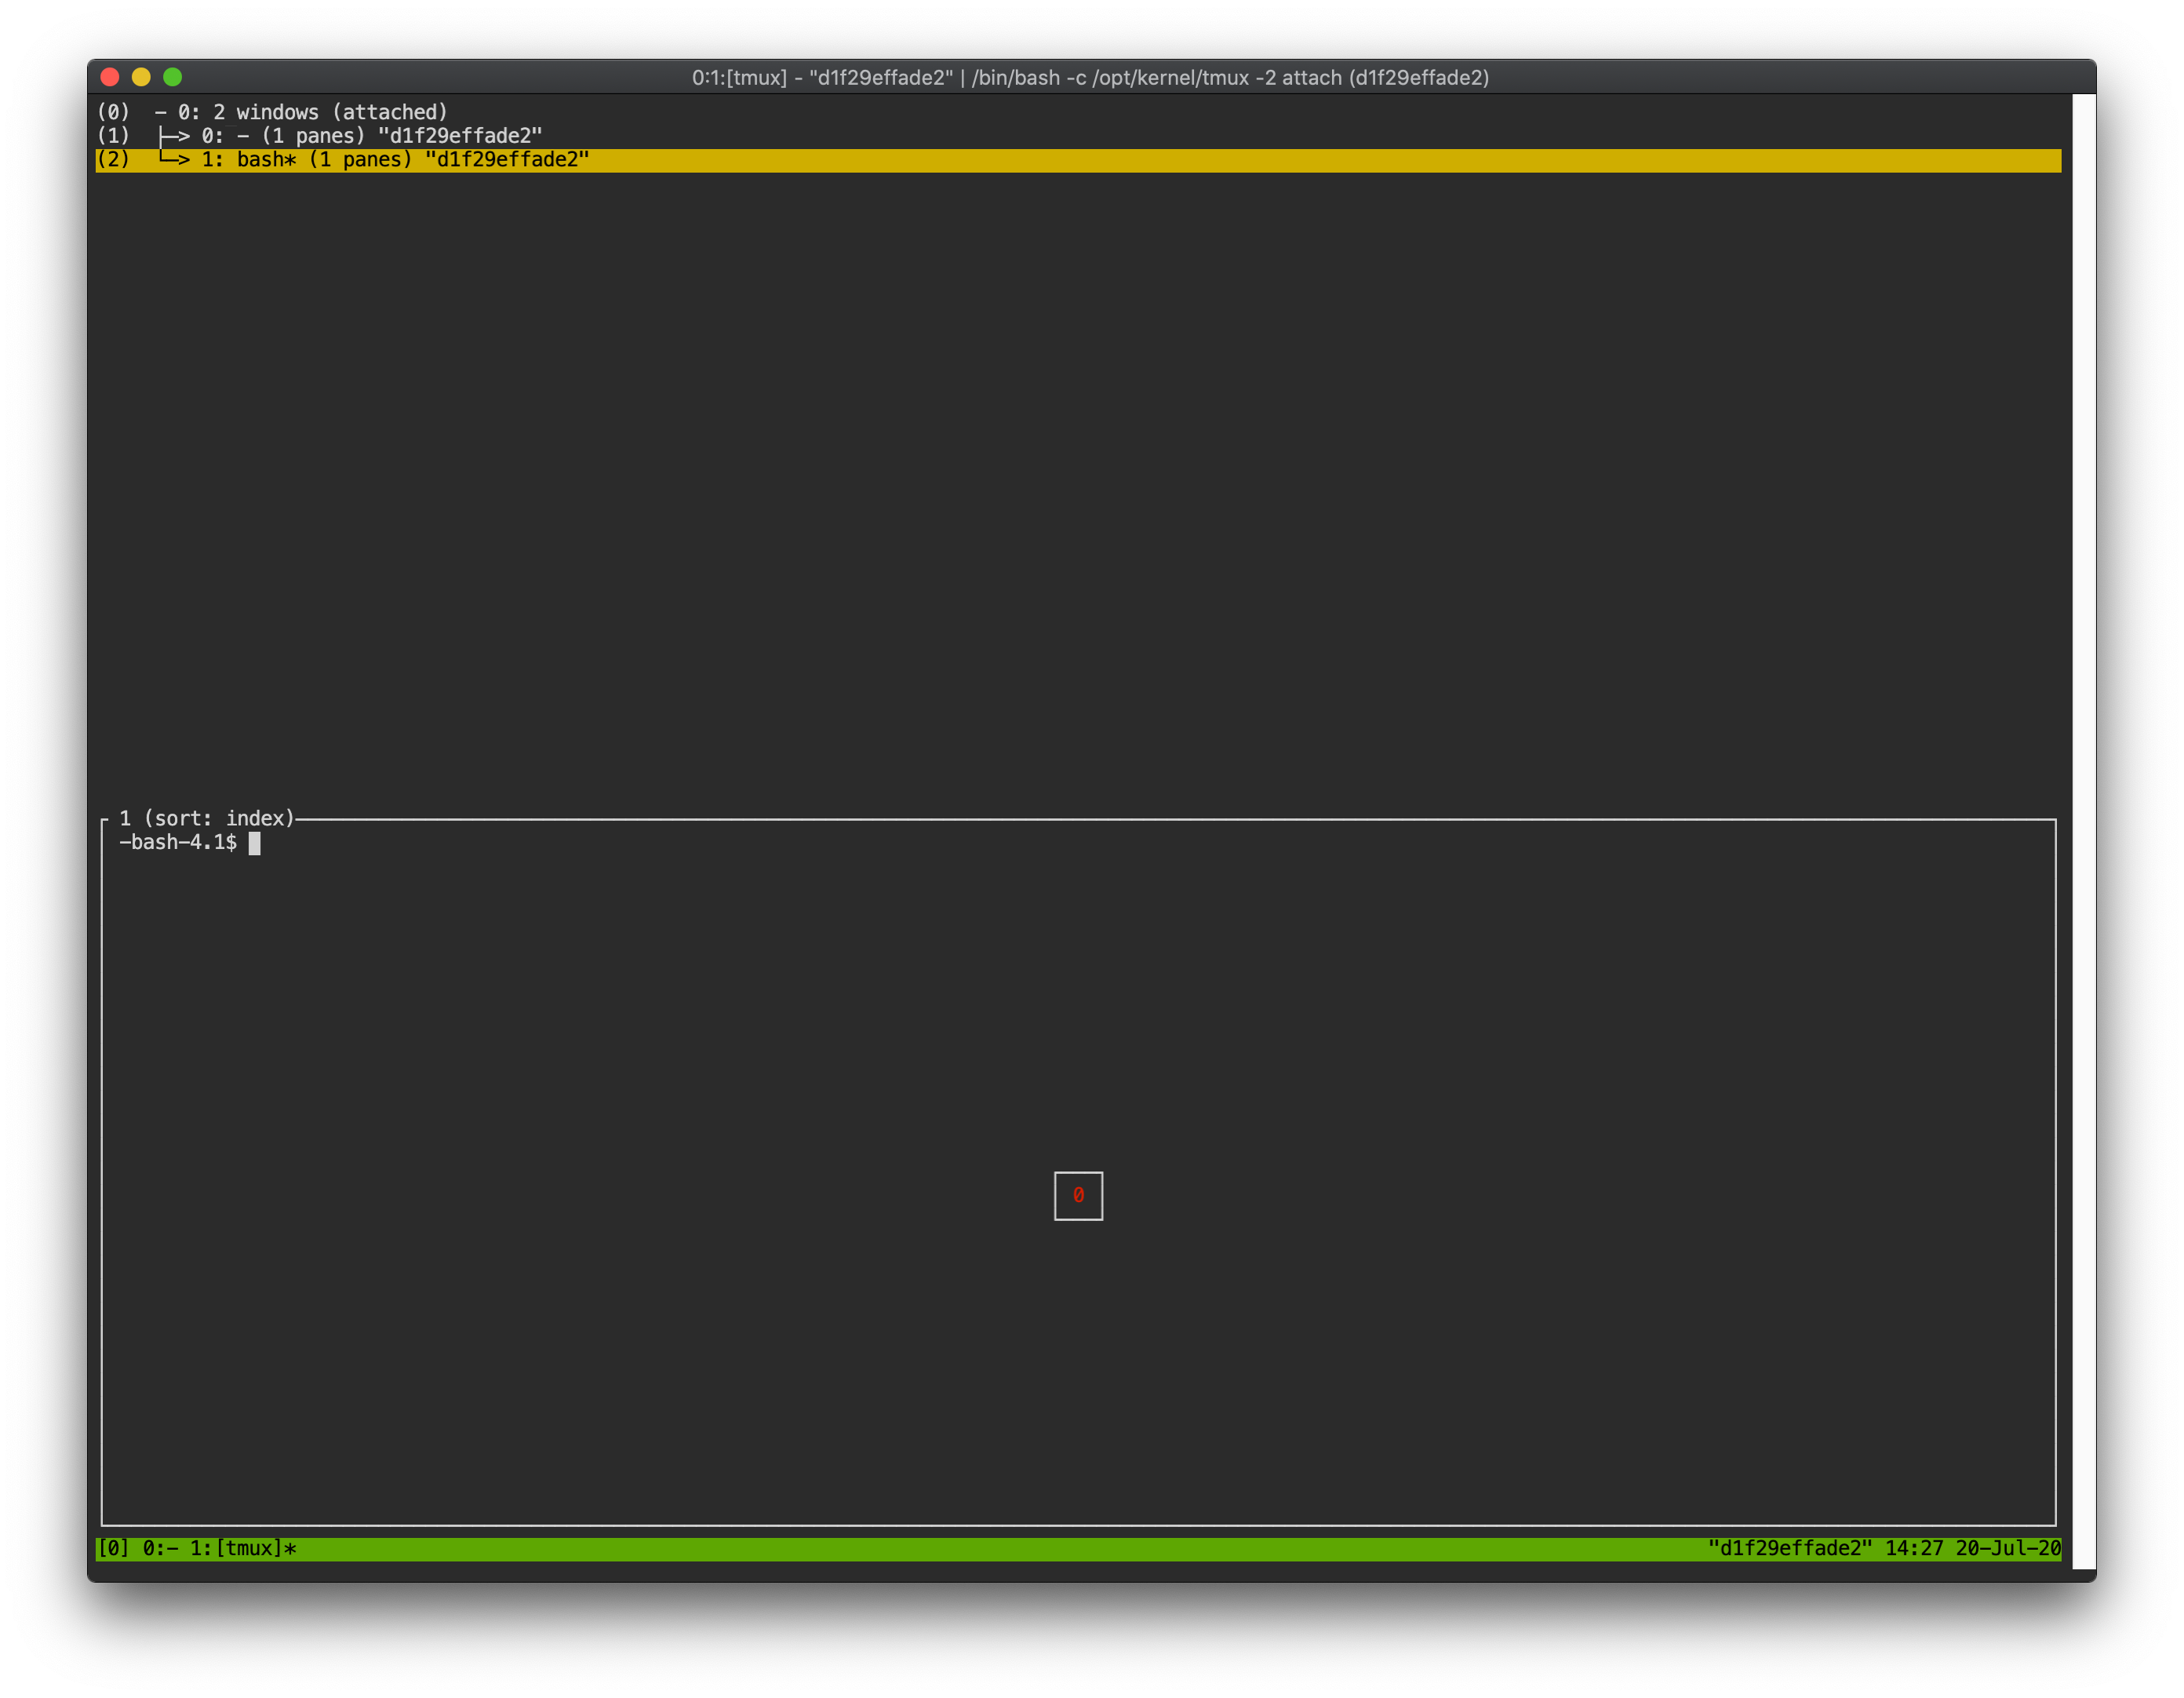
It’s not like that. Let’s press Ctrl-B and then w. You can now see the
list of shells currently open on tmux like following image. Here, the shell
starting with 0: is the shell environment you first saw, and the shell
starting with 1: is the one you just created. You can move between shells
using the up/down keys. Place the cursor on the shell 0: and press the Enter
key to select it.
You can see the shell environment you saw first appears. In this way, you can
use multiple shell environments within a web terminal. To exit or terminate the
current shell, just enter exit command or press Ctrl-B x key and then
type y.
In summary:
Ctrl-B c: create a new tmux shellCtrl-B w: query current tmux shells and move around among themexitorCtrl-B x: terminate the current shell
Combining the above commands allows you to perform various tasks simultaneously on multiple shells.