Mounting Folders to a Compute Session
Backend.AI provides a function to mount storage folders when creating a compute session.
When new compute session is started, user will have access to the/home/work/ directory.
Normal directories and files created under /home/work/ will disappear when the compute session is terminated.
This is because compute sessions are dynamically created and deleted based on the container.
To preserve data inside a container regardless of the container's lifecycle, a separate host folder must be mounted in the container, and then files must be created within the mounted folder.
Go to 'Sessions' page and click the 'Start' button.
After filling out the 'Session Type', 'Environments & Resource allocation' steps,
navigate to the 'Data & Storage' step to see a list of folders that users can mount.
From this list, choose the folders to mount and add them, or select multiple folders to mount more.
The documentation will explain how to mount two folders, user1-ml-test and user2-vfolder,
and then create a session.

Note
By looking at the data and folder information within that project, users can see information such as usage mode, the storage host the folder belongs to, permissions, and more. Note that the 'Data & Storage' step only outputs data folders that are mountable by the current user. For example, folders that belong to other projects cannot be viewed.
Note
Clicking a 'folder name' in the 'Data & Storage' step will open the folder explorer for that folder. From this, users can view the folders that have been created, create new folders, and upload files. For more detailed instructions related to folders, please refer Explore Folder section.
Alternatively, a new virtual folder can be created by clicking the '+' button. For further information on how to create a new folder in session launcher page, please refer Create storage folder section.
In the created session, click the created session name to open detail information drawer. Then,
click the 'Execute Terminal App' icon button (upper right corner, second from the right) to open terminal app.
Or you can also open terminal app from the notification.
ls command will mount user1-ml-test` folder and ``user2-vfolder under the user1-ml-test
and user2-vfolder folders are mounted under the home directory.


Note
The selected folder will be mounted with its name under /home/work/ inside the compute session, by its default.
For example, if folder's name is test, it is mounted on /home/work/test.
To customize the mount path, write an absolute path in the 'Path and Alias' input fields.
Writing /workspace in the input field of the test folder will mount to /workspace inside the session.
Writing a relative path will mount the folder under /home/work/ with the path.
Backend.AI gives an option to preserve files in folders when a compute session is deleted. The example below illustrates what's happening.
Under the user2-vfolder, create a test_file.
Fill the contents with "file inside user2-vfolder".
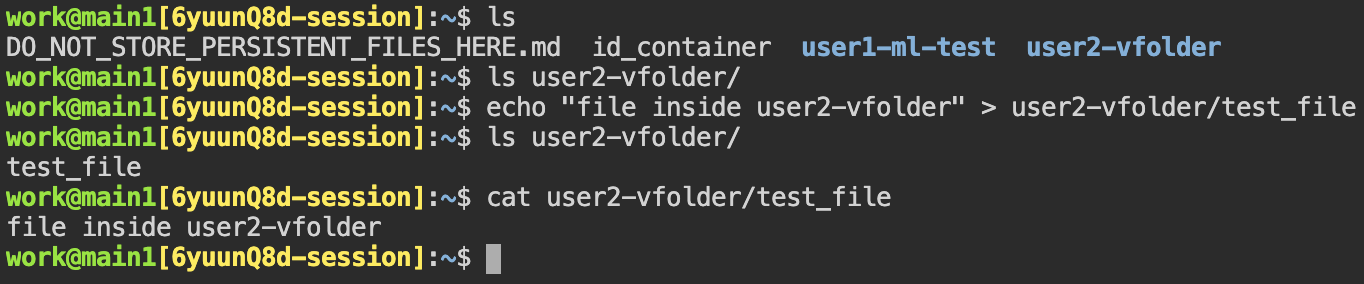
Running ls command against user2-vfolder, users can confirm the file was created successfully.
Please note the contents of the file can be chekced with cat command.
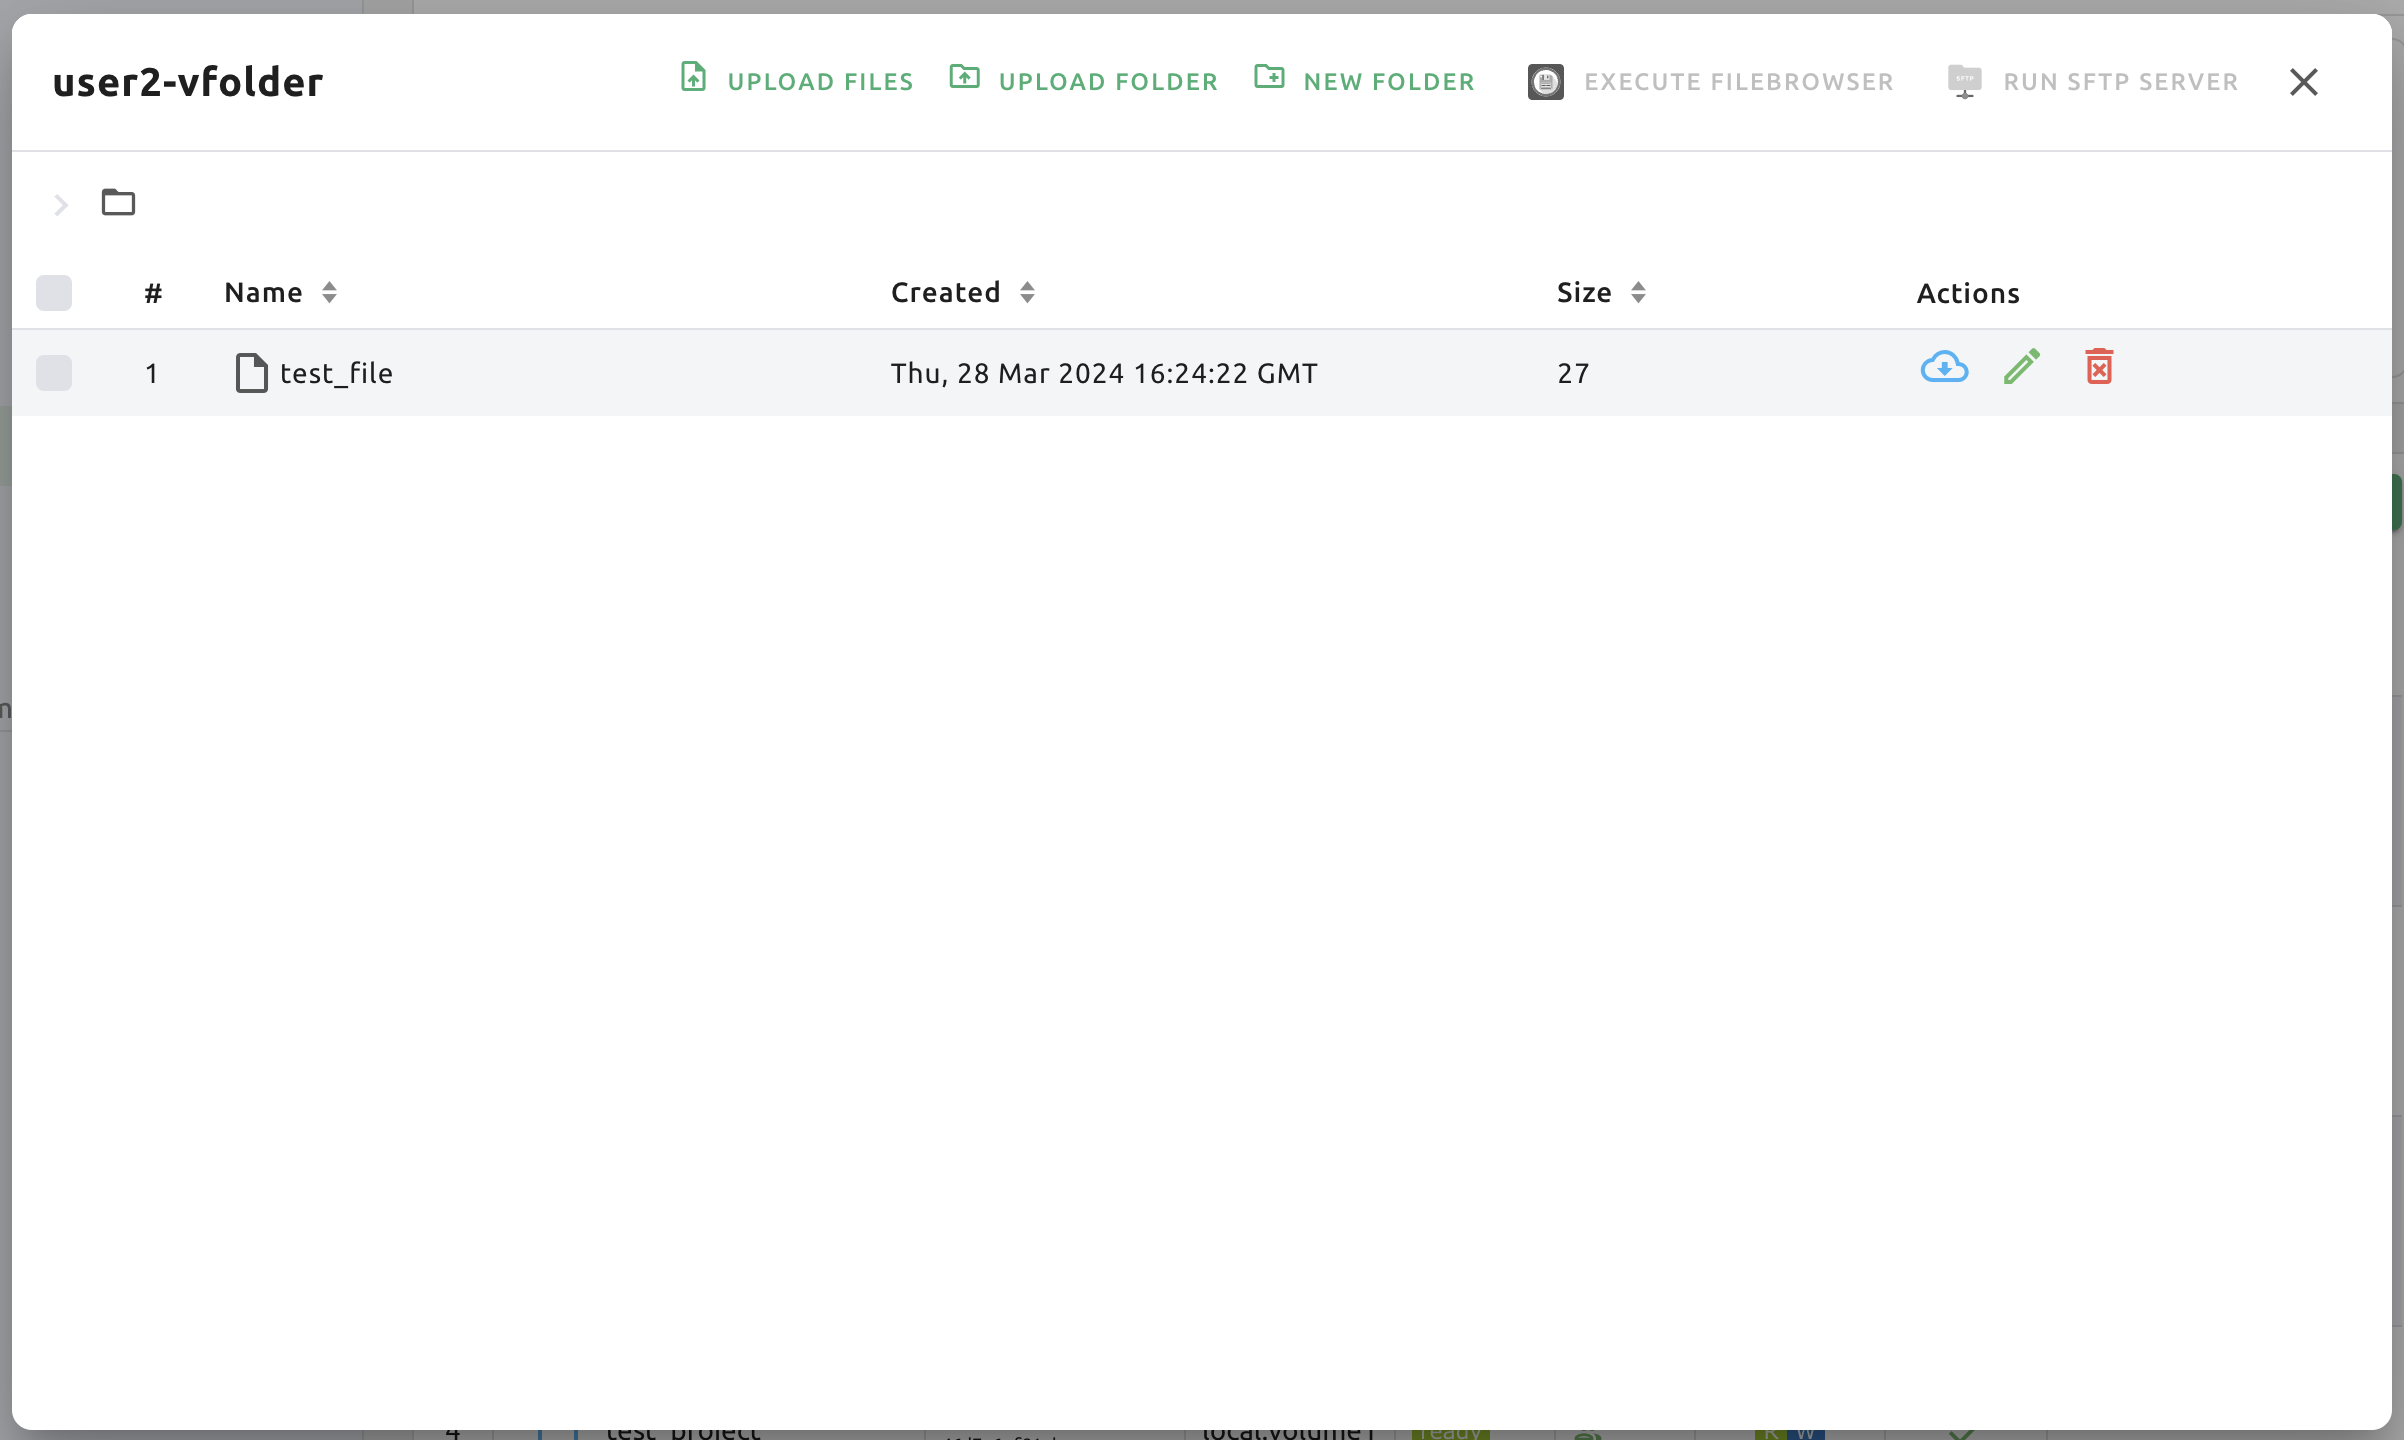
Now delete the compute session and go to the Storage page.
Locate the user2-vfolder folder, open a file explorer and check that the test_file exists.
Click the 'download' button in 'Actions' tab to download the file to the local machine and open it
to confirm that the contents are "file inside user2-vfolder".
Performing file management on a mounted folder when you create a compute session, data can be preserved even after users ends the compute session.
Configure a compute session environment using an automount folder
If a new program or library is required that is not pre-installed in a compute session, a Storage folder attribute and automount-folder, which is independent of the compute session lifecycle, can be used to install the package. Configure a consistent environment regardless of the type of compute session.
Install Python packages via pip
Creating a folder named .local allows a user to install Python user packages in same folder.
pip by default installs the packages in the .local folder under the user's home folder
(Please note that automount folder is mounted under user's home folder).
So, to keep a Python package called tqdm installed at all times, regardless of the computing environment,
a command like the following could be issued from the terminal:
pip install tqdm
After that, when a new compute session is created, the .local folder where the tqdm package
is installed is automatically mounted, so users can use it without reinstalling the tqdm package.
Warning
When using multiple Python versions or sessions with different Python versions, packages may have compatibility issues.
This can be circumvented by branching PYTHONPATH environment variable via the .bashrc.
This is because the user's pip package is installed in the path specified in the PYTHONPATH.
Install packages via Homebrew
Package managers like Ubuntu apt or CentOS yum usually require the root permission.
For security reasons, sudo and root accesses are blocked by default in Backend.AI's compute session (Depending on the configuration, this may be allowed), so we recommend to use Homebrew on Linux which does not require sudo.
Homebrew can be configured as follows:
Create
.linuxbrewfolder in Data & Storage page.Create a compute session (
.linuxbrewfolder is automatically mounted at/home/linuxbrew/.linuxbrew).Install Homebrew in the compute session, if not yet installed.
$ /bin/bash -c "$(curl -fsSL https://raw.githubusercontent.com/Homebrew/install/HEAD/install.sh)"
Homebrew packages can be installed like following:
$ brew install hello
$ hello
Hello, world!
brew installs packages under /home/linuxbrew/.linuxbrew which is automatically mounted when .linuxbrew folder exists.
So, if an automount folder named ''.linuxbrew'' is created, the Homebrew packages previously installed can be used again, even if the compute session is deleted and a new compute session is created.